eForm v3.5 brings a lot of awesomeness to our product, custom URL based integration is just one of them. With this feature, you can send eForm submission data to any URL of your choice and use any handler through the URL to process the data. It can be used for customized reporting and data mining, zapier integration and much much more. Within this integration, nothing is really hard coded. So you can change parameters, choose how the query is sent and whether the formatting is array or simple string.
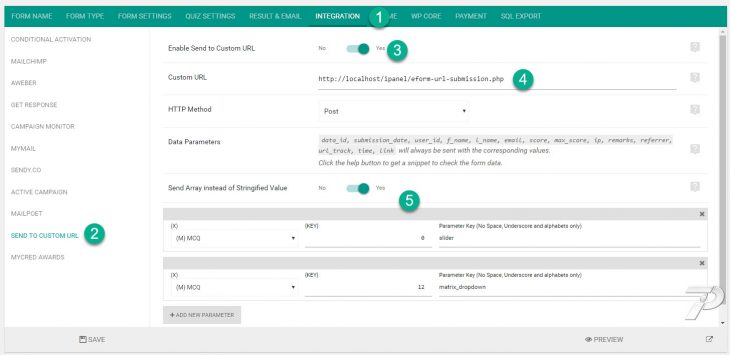
#1: Enable Send to custom URL
- Go to eForm > Form Builder by creating or editing a form.
- Go to Integration > Send to Custom URL.
- Enable the configuration.
- Add the URL.
- Choose how parameters are sent, array or simple string.
- Add additional parameters to send data from your existing form elements.
Save and you are done.
#2: Testing out the integration
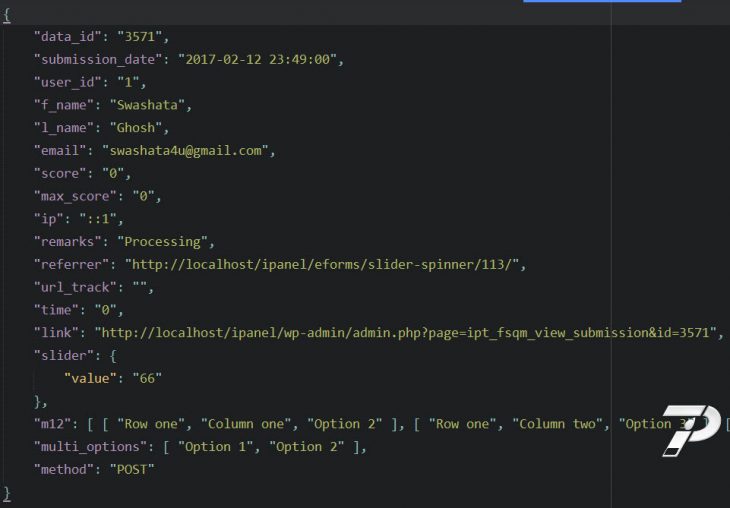
When this is enabled, eForm will automatically send data to the URL you have mentioned. To test it out, you can use the following PHP in the URL source and it will catch and save the data in a json file.
<?php
// Check if request is empty
if ( ! empty( $_REQUEST ) ) {
	// Get the request. Works both for GET and POST
	$info = $_REQUEST;
	// Save HTTP METHOD for debugging
	$info['method'] = $_SERVER['REQUEST_METHOD'];
	// Create the JSON
	$json = json_encode( $info );
	// Store it in a file
	$filename = dirname( __FILE__ ) . '/eform-url-' . ( isset( $_REQUEST['data_id'] ) ? $_REQUEST['data_id'] : uniqid() ) . '.json';
	// We are not really checking if the file exists or not
	file_put_contents( $filename, $json );
// Request is empty, so exit
} else {
	echo 'Bad Request!';
}
Once everything is setup correctly you can see the saved json file in the same directory.
#3: Resubmit webhook on form update
A new option has been added in eForm v4.9. Now you can resend all of the form data on submission update (either from admin or from the user). To use this feature enable Resend webhook on update.
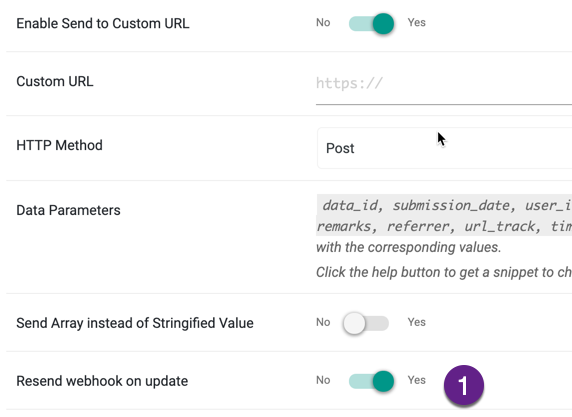
#4: Delimiter option in the Webhook
Since version 4.15, we have added the option to send the data with a custom delimiter for different element types. This will be helpful if your third-party integration has a specific requirement for the submitted data with multiple answers.

- Option Delimiter – Multiple Option Delimiter (For questions like Multiple Options, Matrix etc). Default is \n (New line character).
- Row Delimiter – Multiple Row Delimiter (For questions like Grading, Spinners, Matrix etc). Default is \n\n (Double new line characters).
- Range Delimiter – Range Delimiter (For questions like Grading, Ranges etc). Default is /.
- Entry Delimiter – Entry Delimiter (For the options inside elements like Grading, Spinners, Matrix etc). Default is :.
Zapier Integration with eForm
With the help of custom URL integration, it is now possible to send data to zapier. To get started, please follow the instructions carefully.

Go to Zapier Dashboard and click on Make a Zap.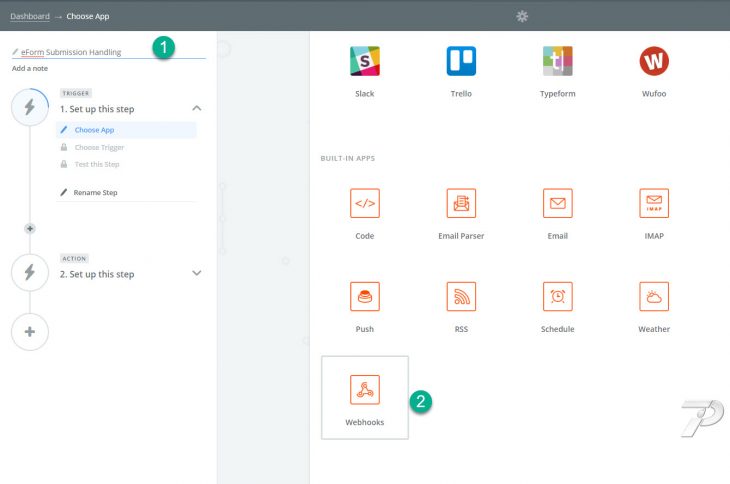
Choose Webhook from the list of BUILT-IN apps.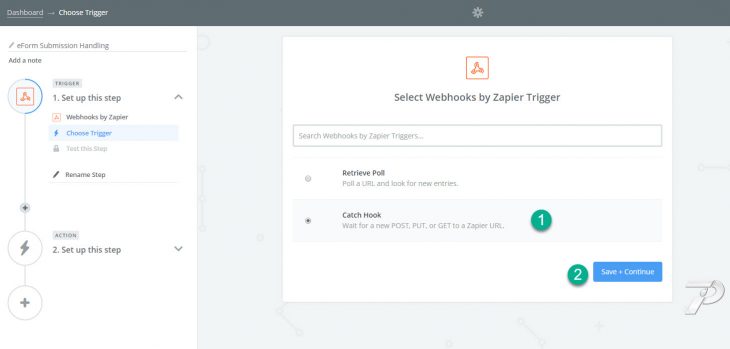
Click on Catch Hook and Continue.- Additionally setup child key.
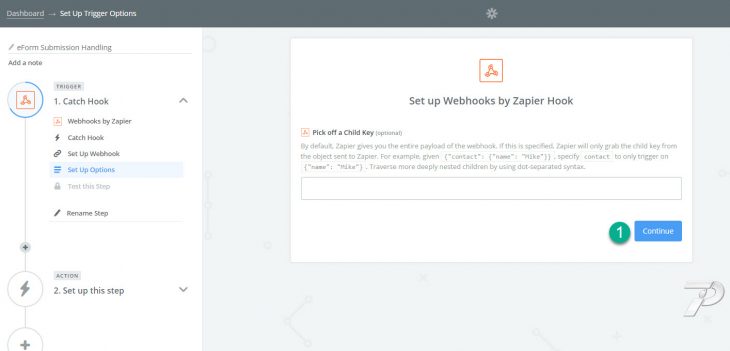
You can skip this step if you want to catch the complete data eForm passes to Zapier. The default ones are:data_id, submission_date, user_id, f_name, l_name, email, score, max_score, ip, remarks, referrer, url_track, time, link - As you click continue, Zapier will give you an unique URL.
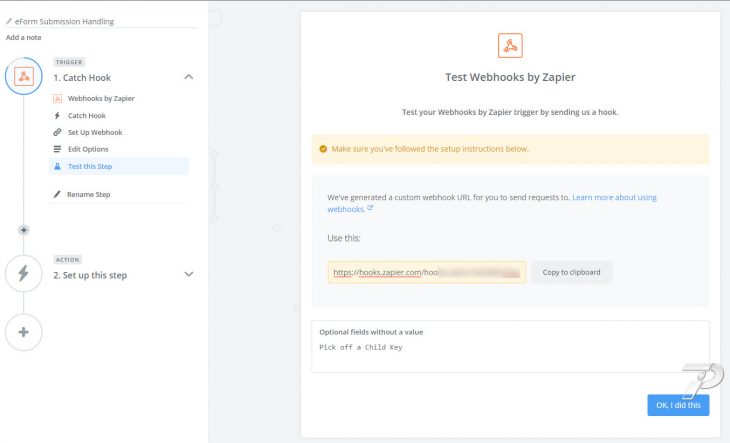
Copy this URL. - Now go to eForm > Integration > Send to custom URL and paste this URL in the field.
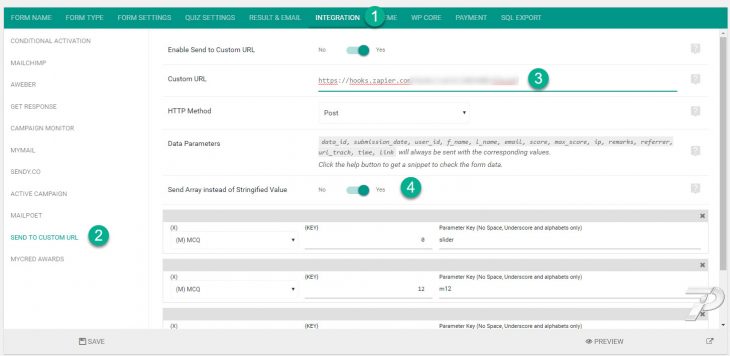
- Save the form and submit it from the frontend to test the data.
- If everything is done correctly, go back to Zapier step and click on Ok I did this.
- Once zapier detects your submission it will show that the setup was complete.
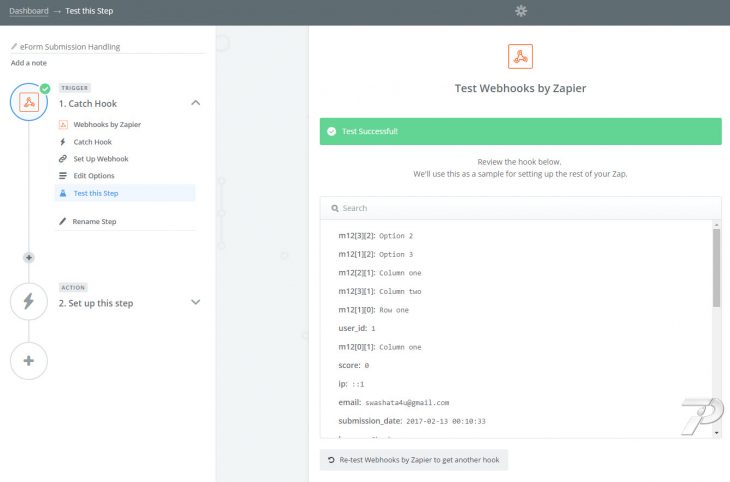
At this step, you can even view the data zapier caught. - Now click on continue and setup the action according to your need.
That is just what you need to do to setup eForm work with Zapier.
1 thoughts on “Zapier & Custom URL based integration with eForm”