Starting eForm v4.7, we support convertkit integration. To enable, kindly follow the guide.
#0: Add needed fields

First make sure you have all the required fields in your form to make it work. What we will need are
- Primary Email.
- Primary First Name.
- Primary Last Name.
#1: Enable Integration
Go to CONFIG > Integration > Convertkit.
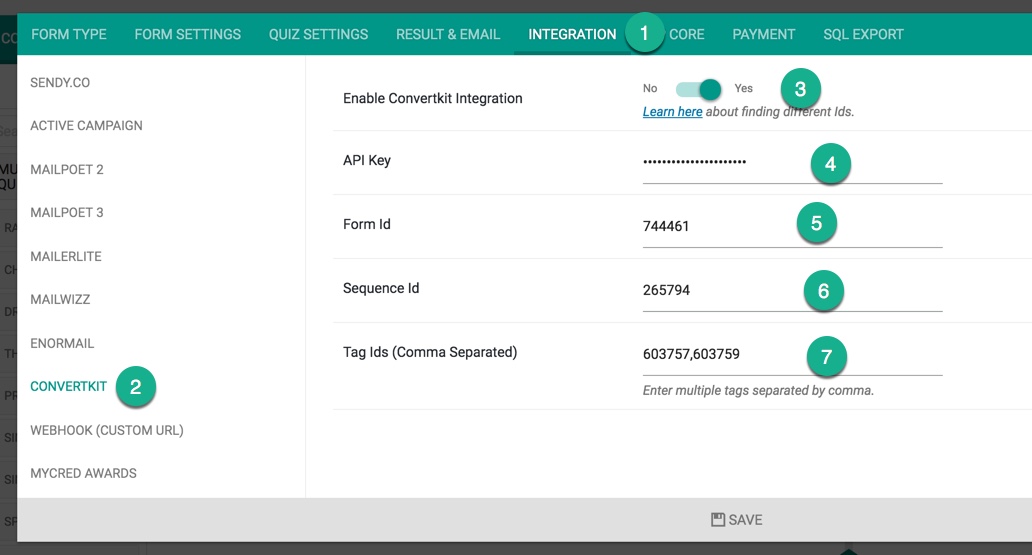
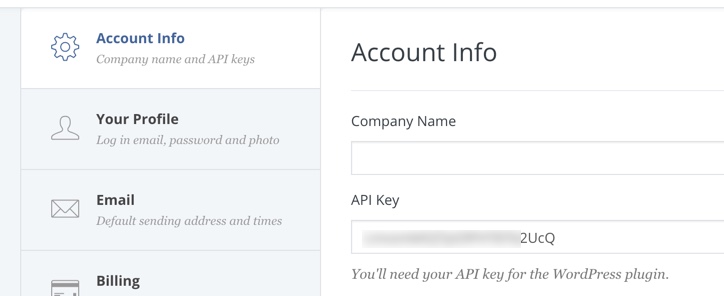
Click on Enable and fill in the API Key. This is the public facing API Key you get from Convertkit > Account Settings.
#2: Enter Form and/or Sequence Id
With convertkit, you must have created forms or sequences. Here you need to place the Id. You can have both form and a sequence if you choose so.
To get Form Id, go to Convert Kit > Forms and edit a form.
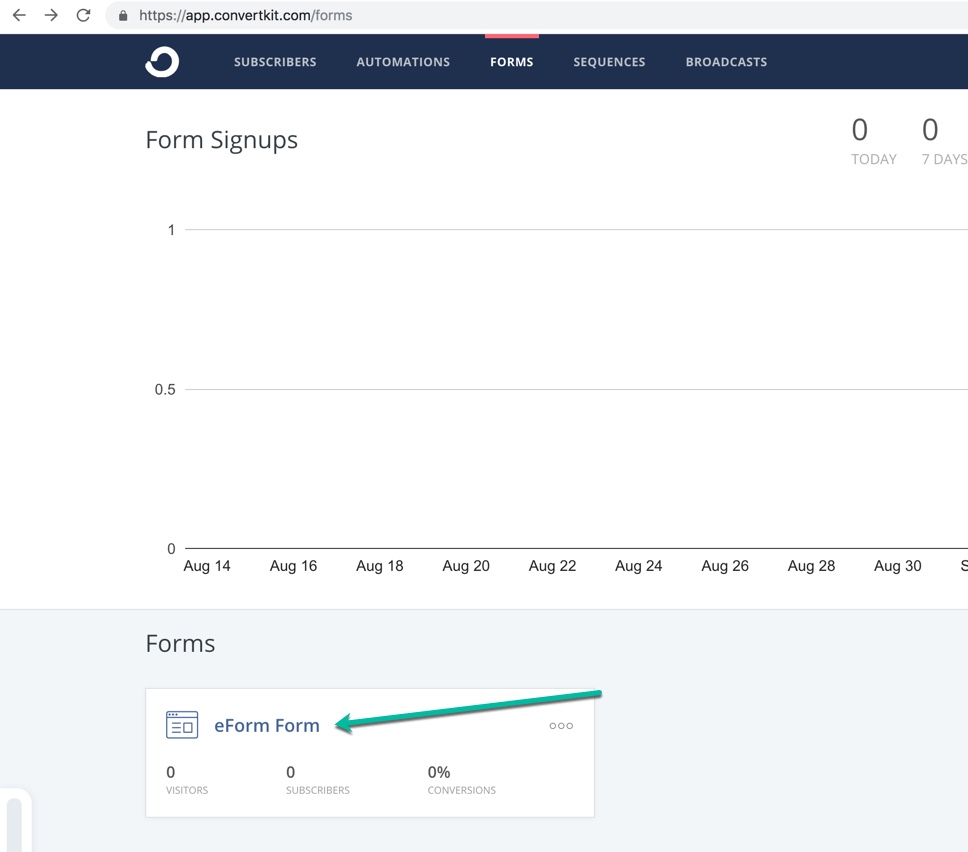
Now note down the URL. It should be something like https://app.convertkit.com/forms/designers/12312312/edit. The part in bold, i.e, 12312312 is your form id.
Similarly for sequences, when you edit, you get an URL like https://app.convertkit.com/sequences/265794. Here the numeric part is the sequence id.
#3: Enter multiple tag ids
You can have multiple tags separated by comma like 123,432 etc.
To find out tag ids, go to your convertkit Subscribers and scroll down to tags. Now edit a tag.
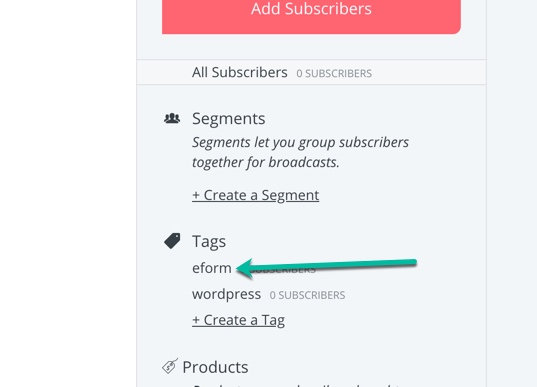
You will get URL like this https://app.convertkit.com/subscribers?subscribable_ids=603757&subscribable_type=Tag
The numeric value that comes after subscribable_ids= is the tag. So for the above URL, it is 603757.
#4: Adding custom fields
This feature is available from version 4.13. First make sure that you have added needed custom fields to at-least one of your subscriber. This makes sure convertkit recognizes the custom fields. For more information checkout this convertkit help article.
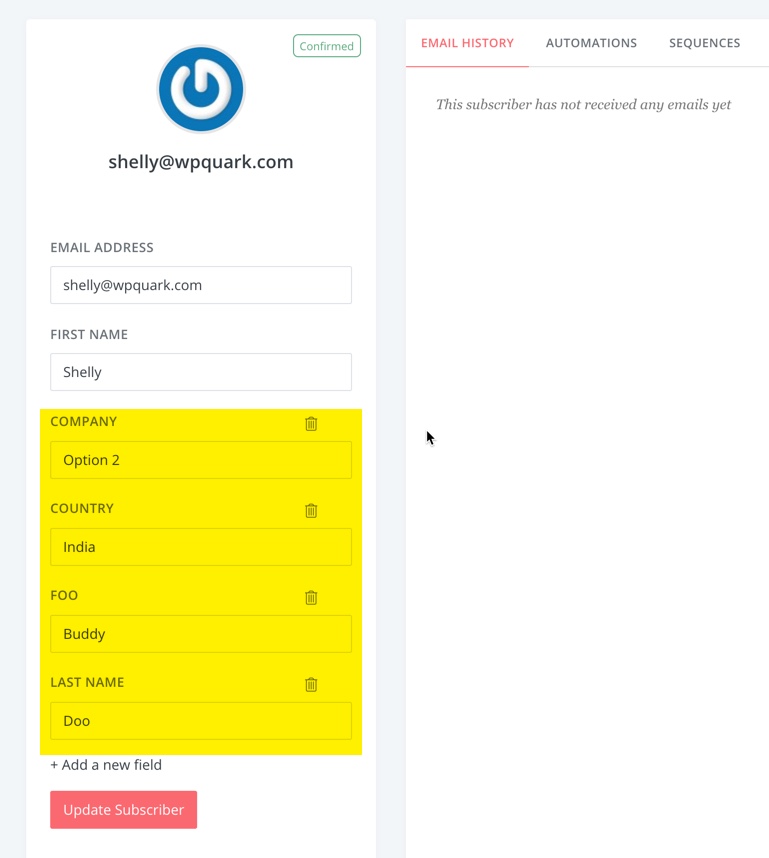
In the image above, we have added the following custom fields
- COMPANY.
- COUNTRY.
- FOO.
- LAST NAME.
The Id of the custom fields, which we would enter into the form, would be lowercase version of the above. Also we need to replace space with underscore (_)
So the custom fields Id of the above would be
- COMPANY –
company. - COUNTRY –
country. - FOO –
foo. - LAST NAME –
last_name.
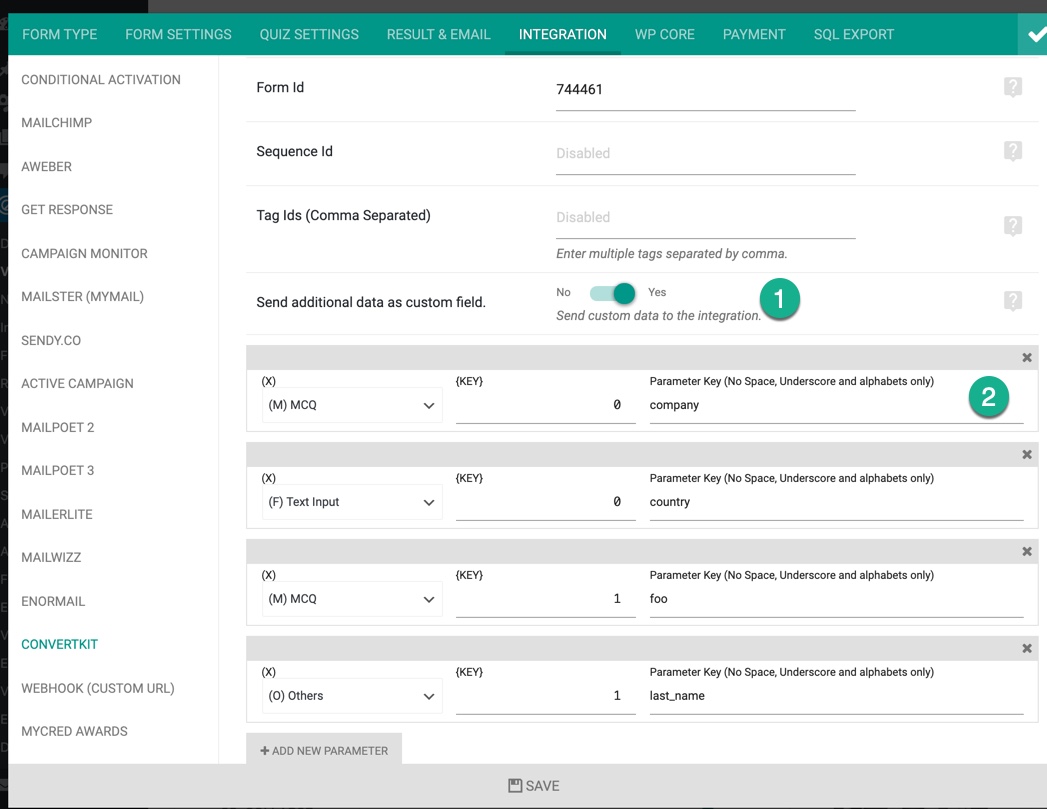
Now go to form builder CONFIG > INTEGRATION > CONVERTKIT and activate Send additional data as custom field. Now map your form element to one of available custom fields as shown in the image below.
Now save your form and you are ready to accept custom fields.