Get Response is premium Email Marketing and Autoresponder software. eForm has built in facility to integrate with Get Response. Please follow the procedure below.
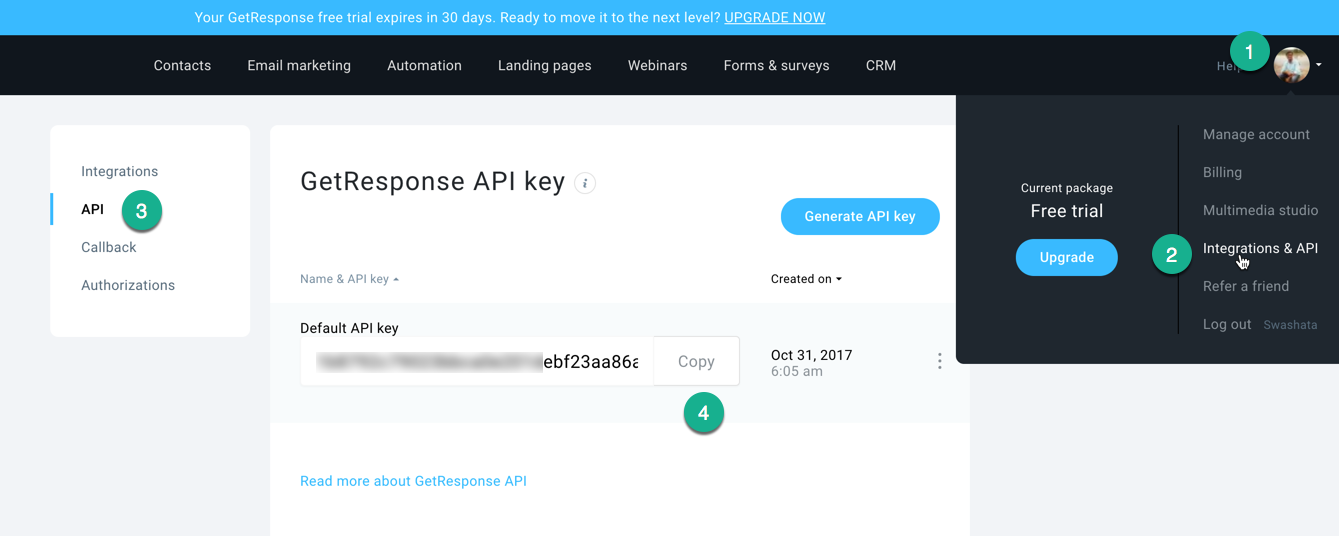
#1: Get API Key and Campaign name:
To get the API Key, please read this article on their knowledge base. In short, go to Your Account > Integrations & API > API. Check the screenshot below.
Starting version 4.1.0, eForm requires you to use the List Token instead of Campaign Name. The change is due to the change in GetResponse API (we use the latest v3 now).
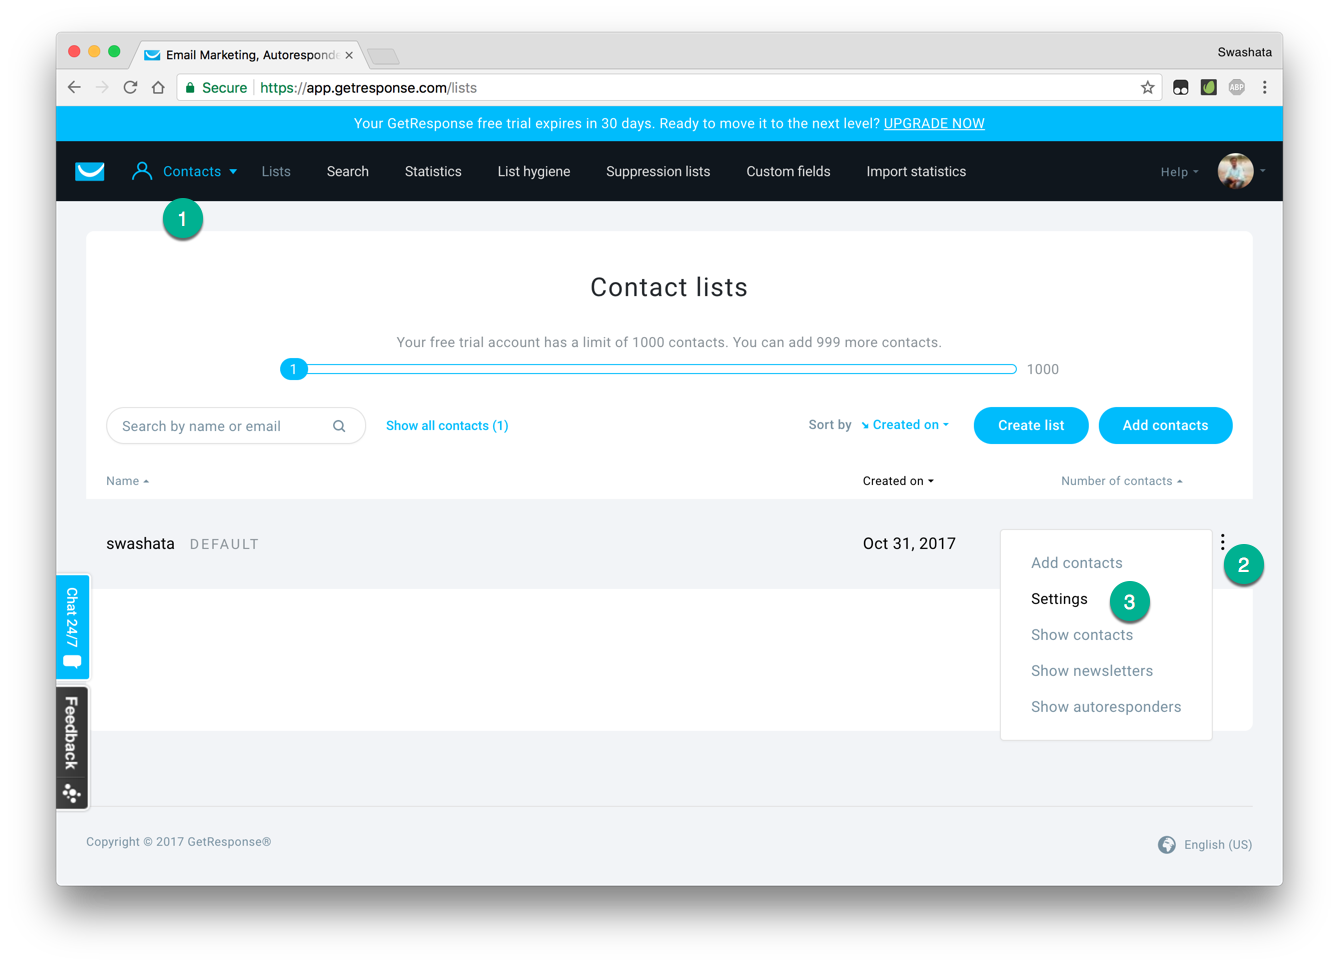
Go to Dashboard > Contacts and click on Settings through the three dots of your desired list.
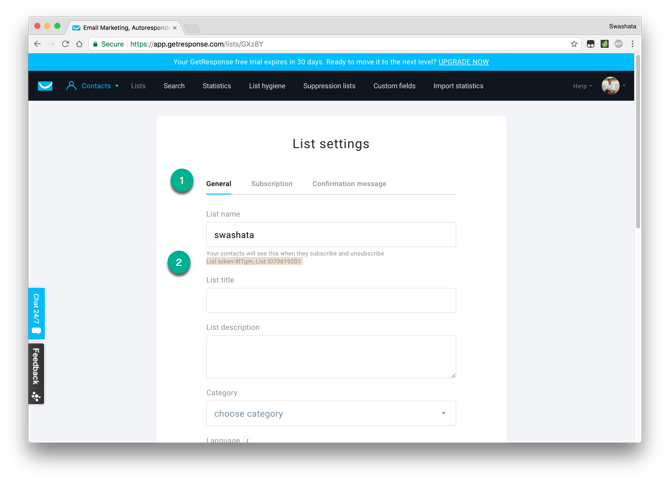
Now go to Settings > General and there you will find List Token and List ID. We will be needing List Token.
#2: Enter Integration Settings:
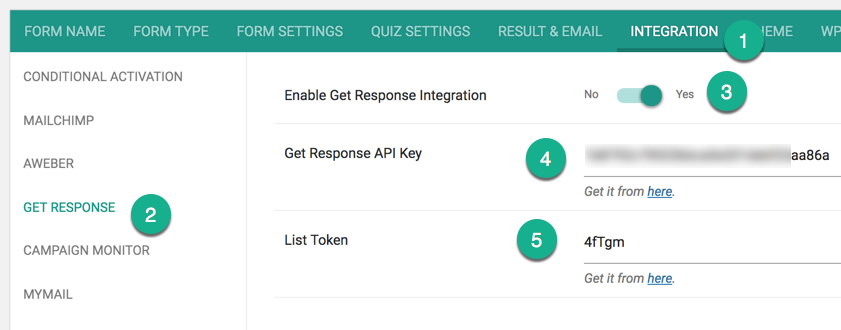
Now go to the form builder and click on Enable Get Response Integration. Next, add the settings:
- Get Response API Key: The API Key you have obtained from step 1.
- List Token: The API token of your list as shown in step 1.
#3: Add necessary fields:
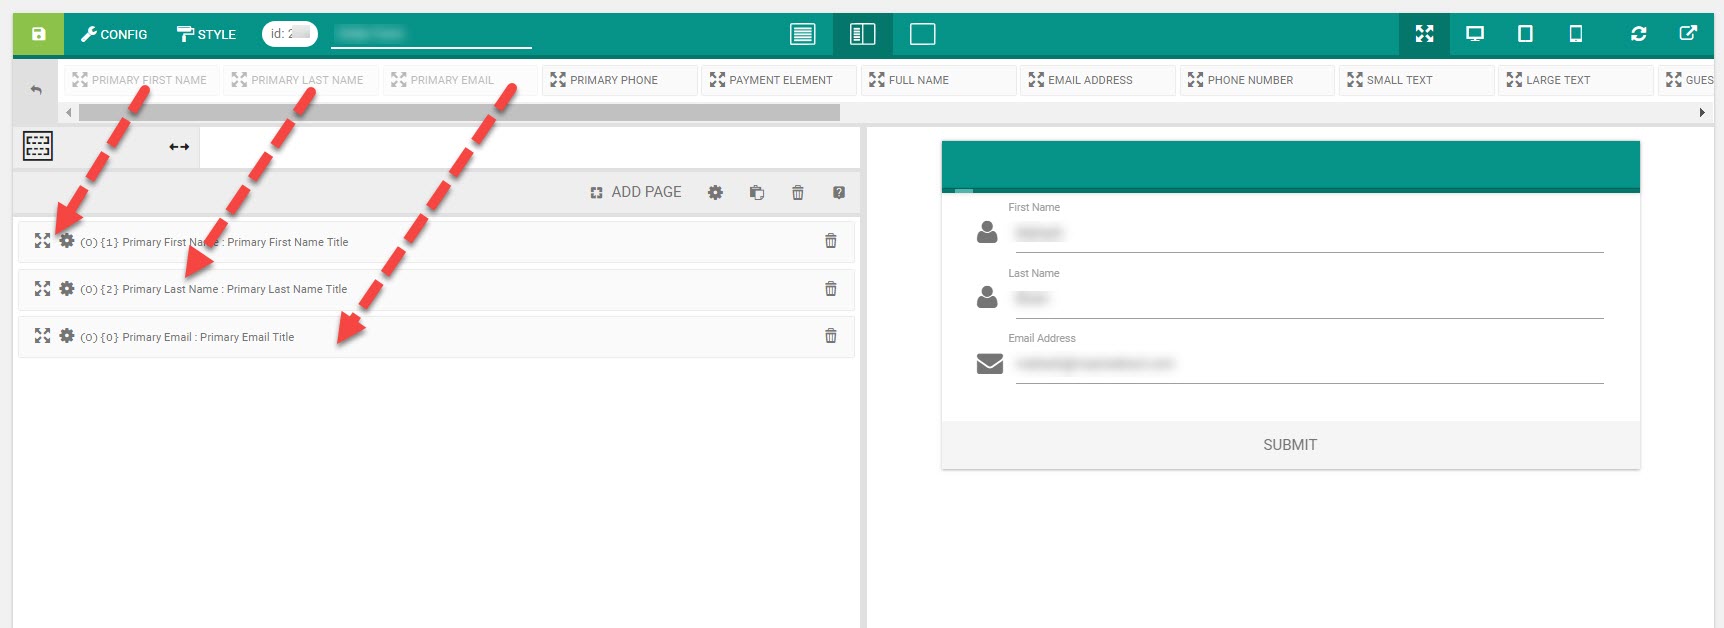
For any integration to work, make sure you have the Primary Email element added somewhere to the form. It is available from Other Form Elements (O). For subscription with full name, make sure you add the Primary First Name and Primary Last Name elements too.
#4: Send custom field data
To send custom field data along with the integration, we need to first create custom fields. Go to your GetResponse dashboard and visit Custom Fields section.
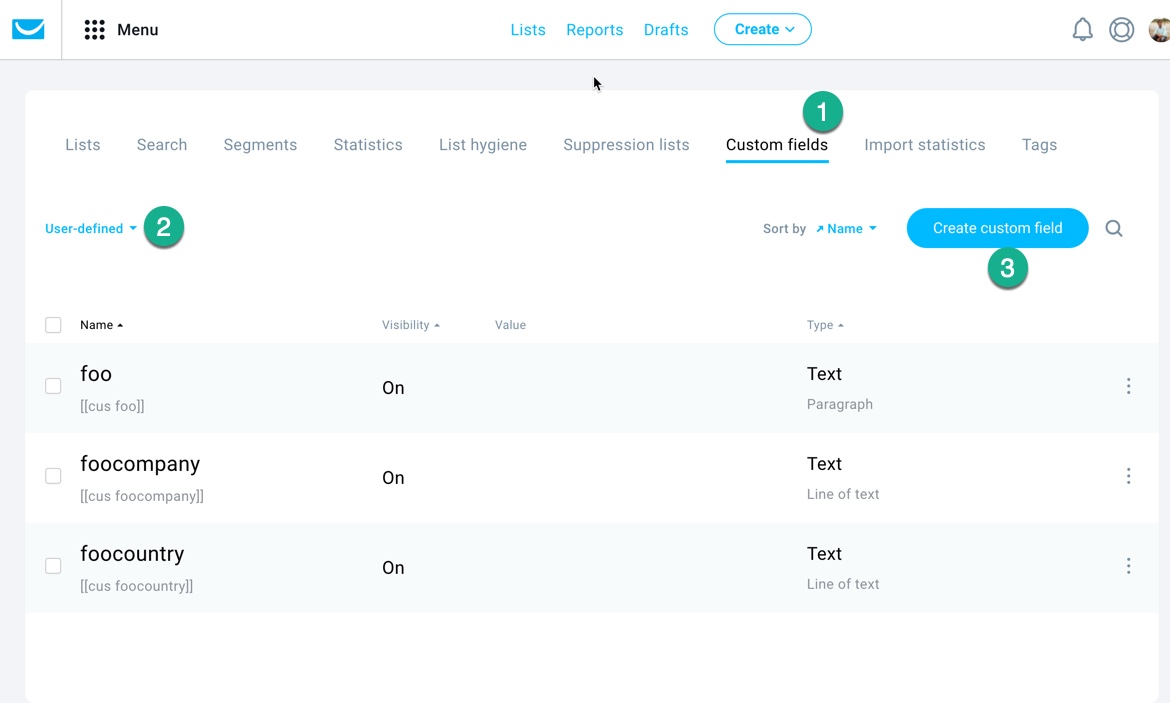
Now click on User-defined and start adding your custom fields. In the image above we have added following three custom fields.
foo.foocompany.foocountry.
We can also use any of the already Predefined custom fields too.
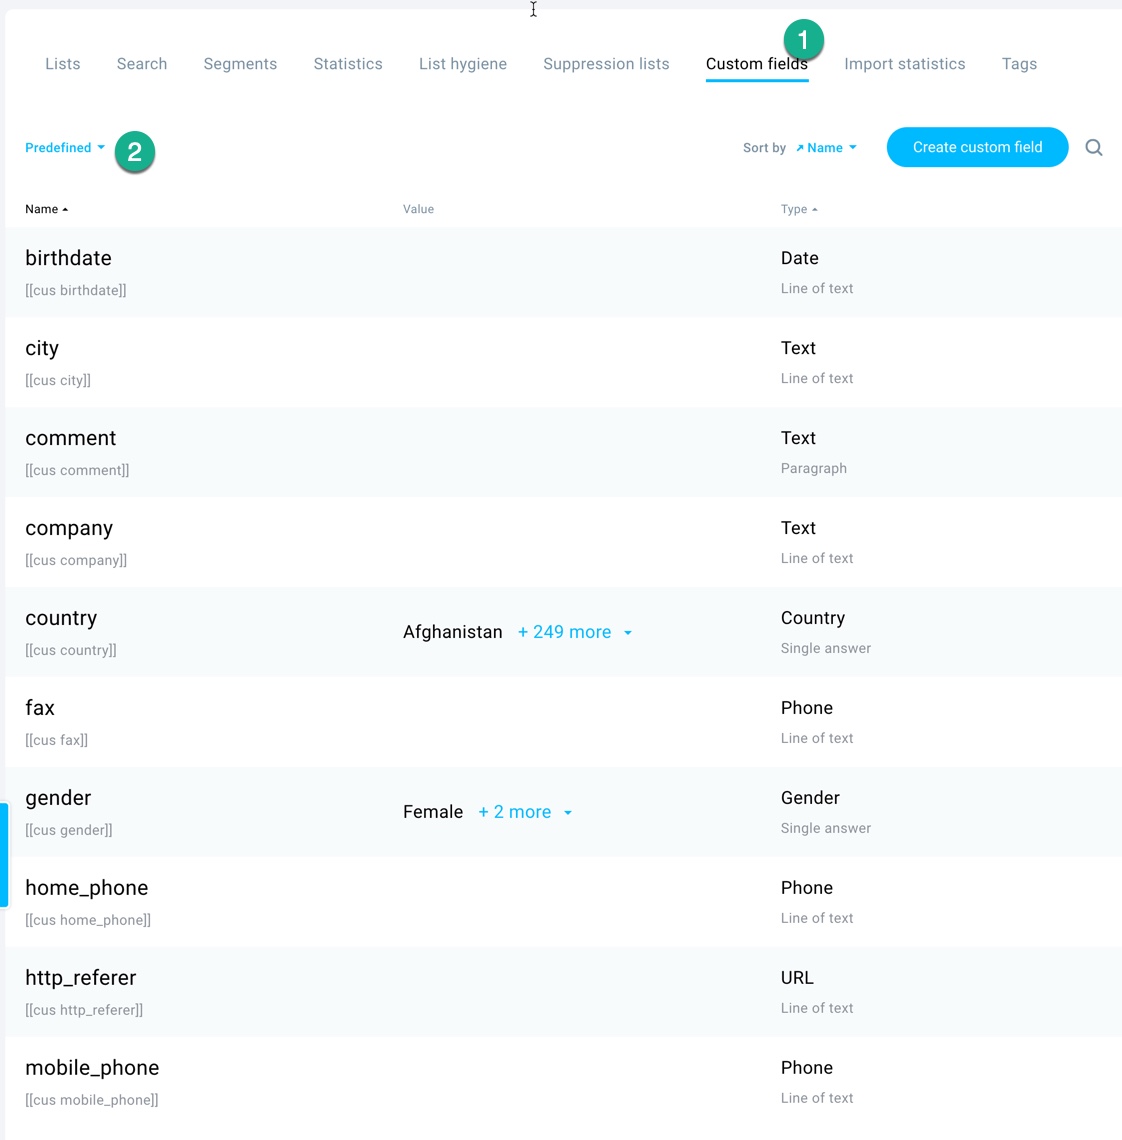
Select Predefined and you will be shown a list of custom fields. What we need from any of them, is the name of the fields.
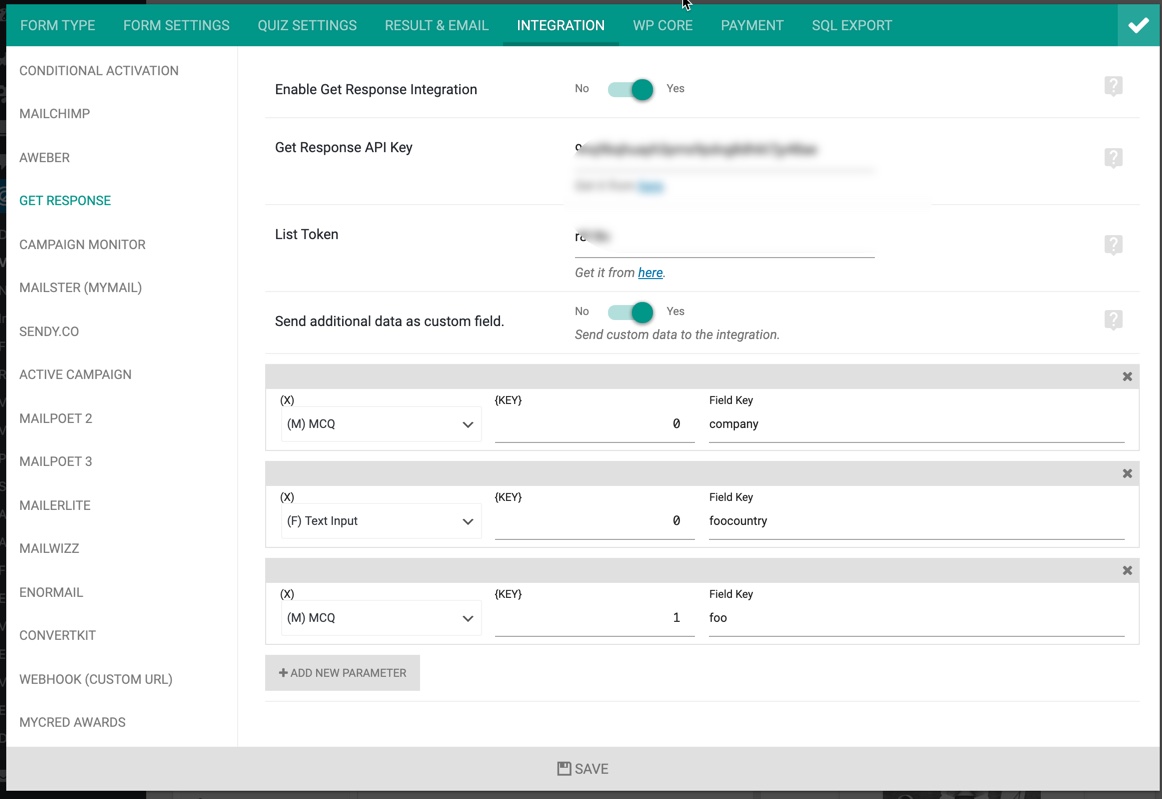
Now back at eForm, go to CONFIG > INTEGRATION > GET RESPONSE and first enable Send additional data as custom field and map form elements with any of the custom fields above. Note that you can put the name of any User defined or predefined fields in the mapper.
#5: Test out the settings:
Now save the form and fill out a sample form. If everything you have entered is okay, then your email should get subscribed to the campaign.