Starting version 4.2, you can add users to MailWizz application through eForm. Please follow the tutorial below to setup the form.
1: Add necessary Fields
Just like any integration, make sure you have the following fields somewhere within your form.
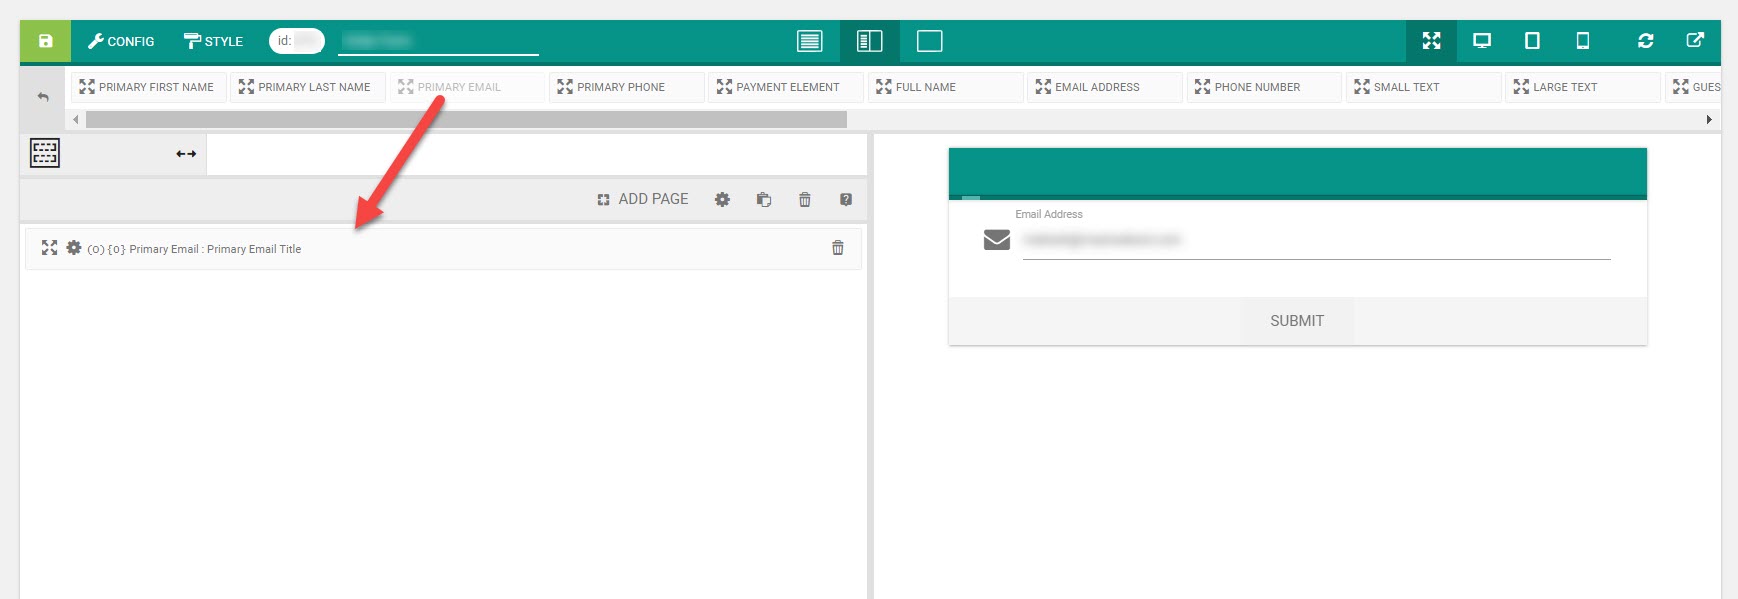
- Other > Primary First Name.
- Other > Primary Last Name.
- Other > Primary Email.
#2: Enable MailWizz Integration
Now under form builder
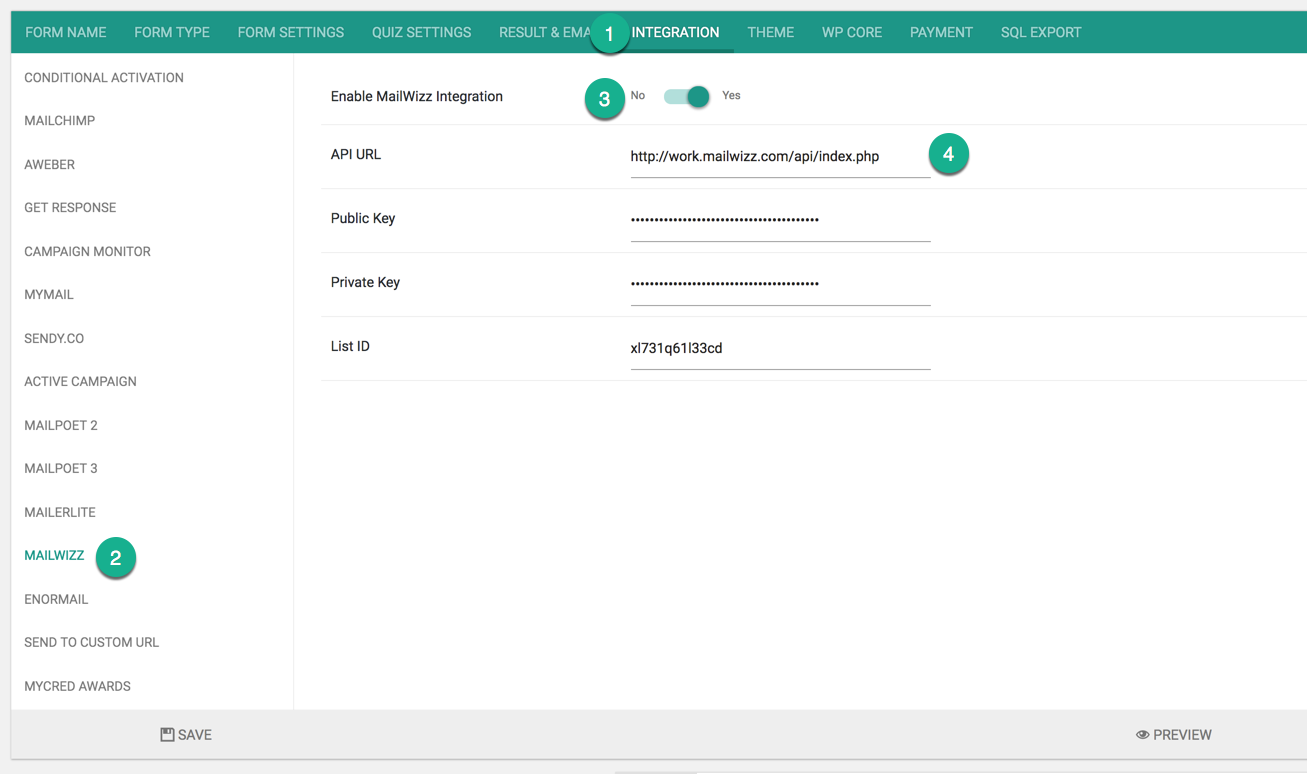
- Go to INTEGRATION > MAILWIZZ.
- Enable the settings.
- Put your API URL, Public Key, Private Key and List ID.
- Save the settings.
And you are done. For more information on how to get the configuration options please follow the screenshot below.

- Go to MailWizz admin area > API.
- Click on the INFO icon from the top right to get API URL.
- Create a new API key set or any existing.
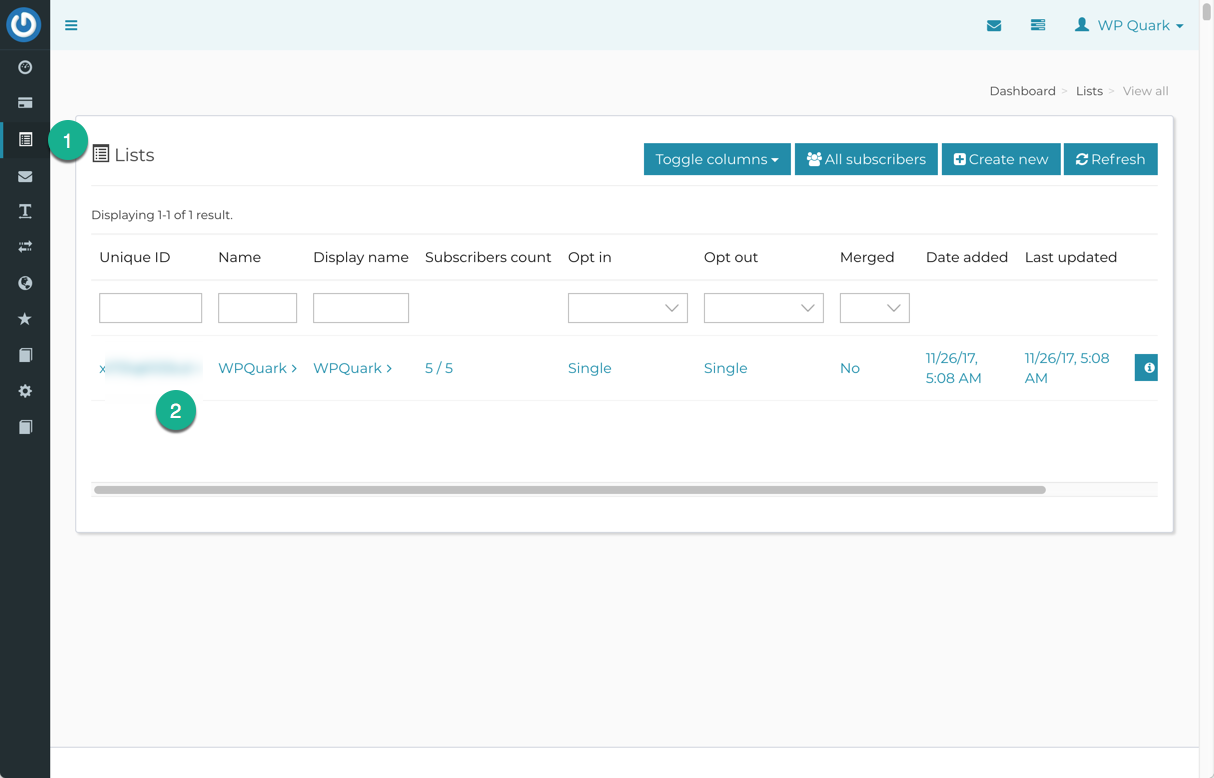
To get list ID, simply navigate to Lists and copy the unique ID.
#3: Send custom fields
First create your custom fields on your MailWizz instance. Go to Lists and click on the list you want custom fields for.
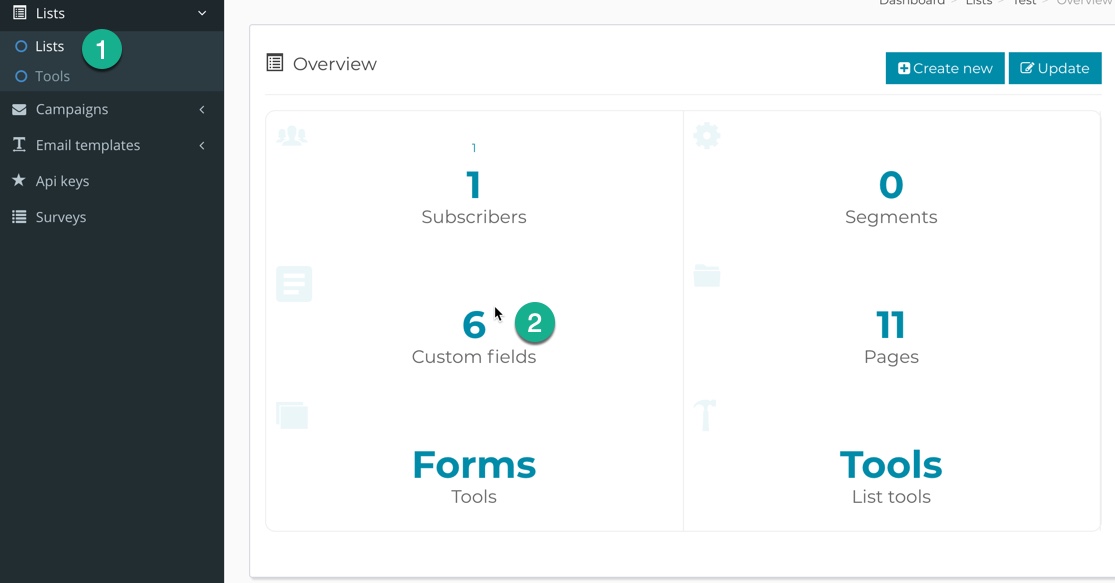
Now click on Custom Fields as shown in the image.
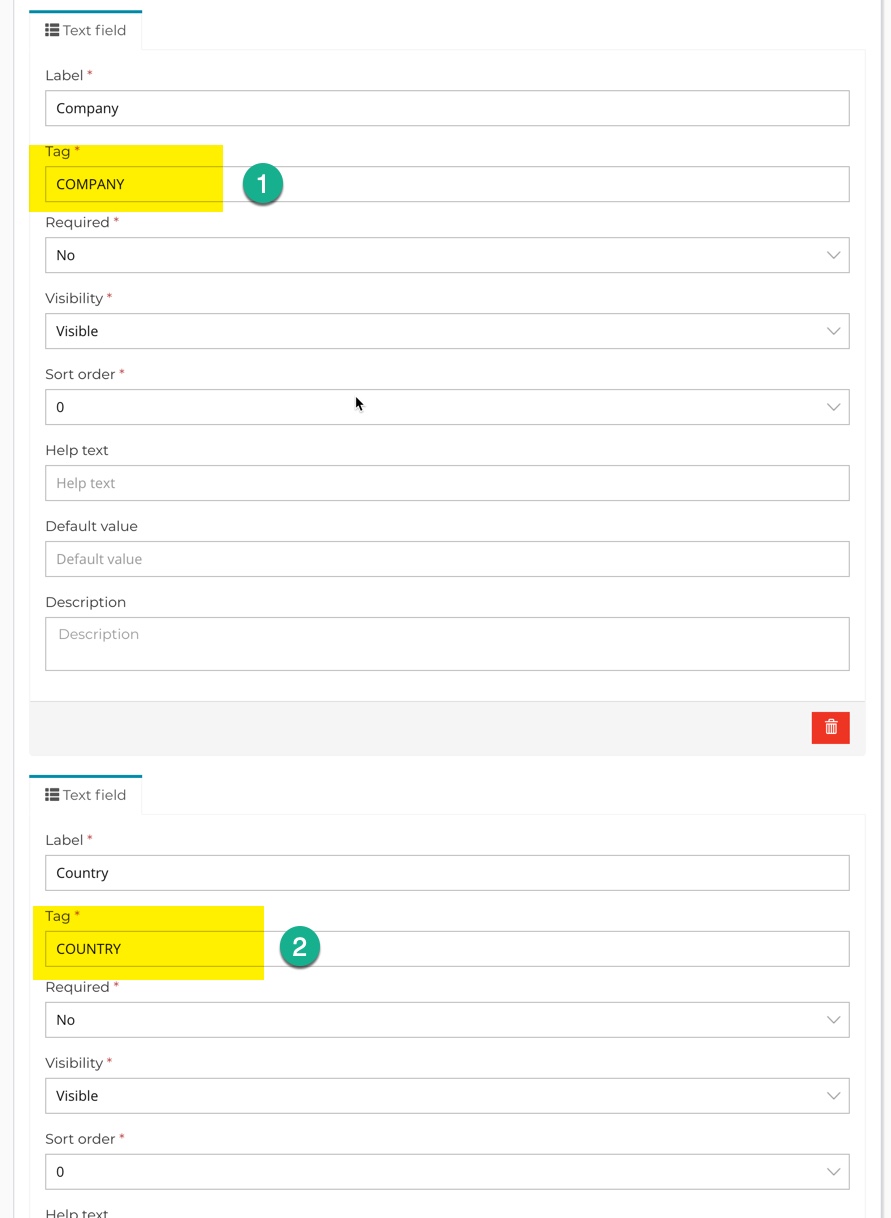
Click on Add new text field and add all your required fields. In the image above, we have created three fields with tags COMPANY, COUNTRY and FOO.
Note down the tag names as this is what we will use to map eForm fields to the custom fields.
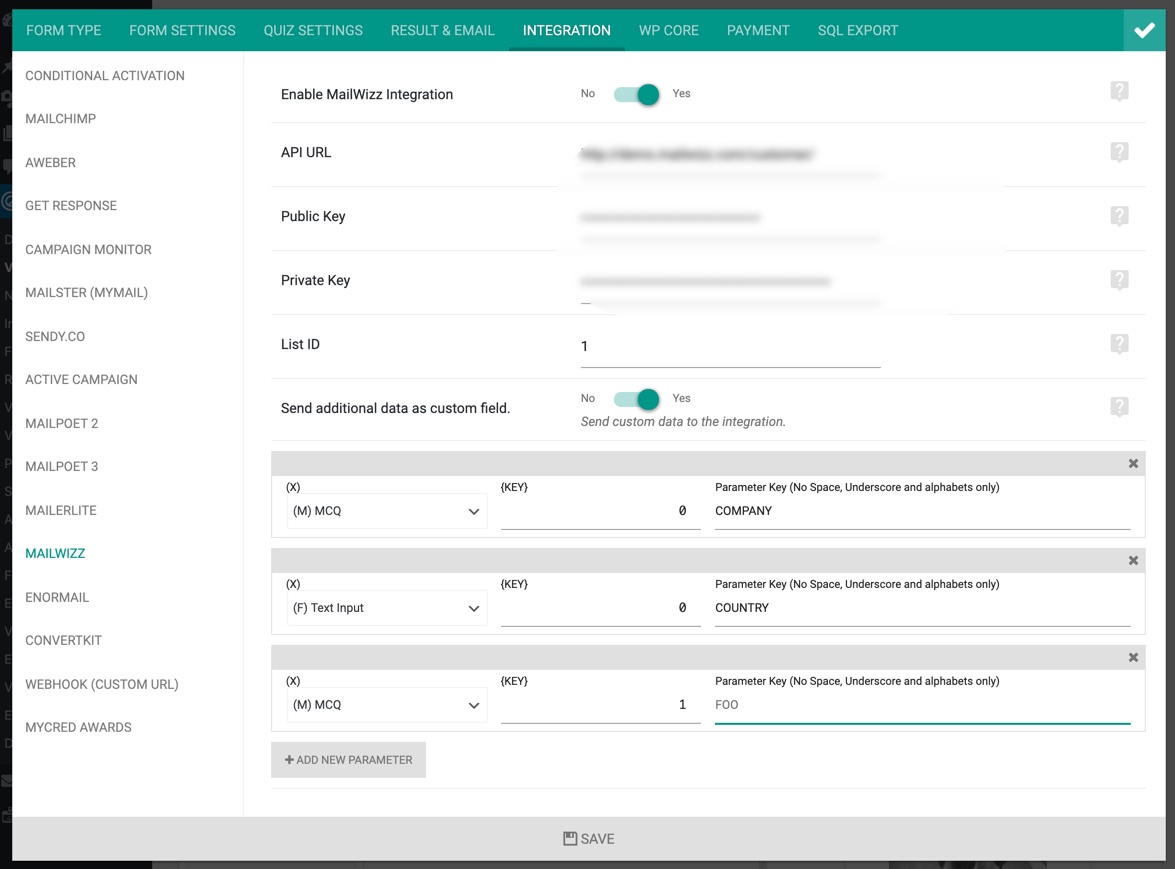
Now go to eForm Form Builder > CONFIG > INTEGRATIONS > MAILWIZZ and enable Send additional data as custom field. Here map your custom fields to eForm fields as shown in the image.
Save the form and now it should send custom data with new subscribers.