MailPoet 2 integration has already been a part of eForm. Starting version 4.1.1, we will support MailPoet 3. MailPoet 3 has come out of beta and eForm now fully supports and works with both the versions of MailPoet.
#1: Preparation
- Install MailPoet 3 plugin and activate it.
- Optionally create some more lists.
- If you do not want double opt-in, go to MailPoet > Settings and disable it.
#2: Make Sure Fields are Present
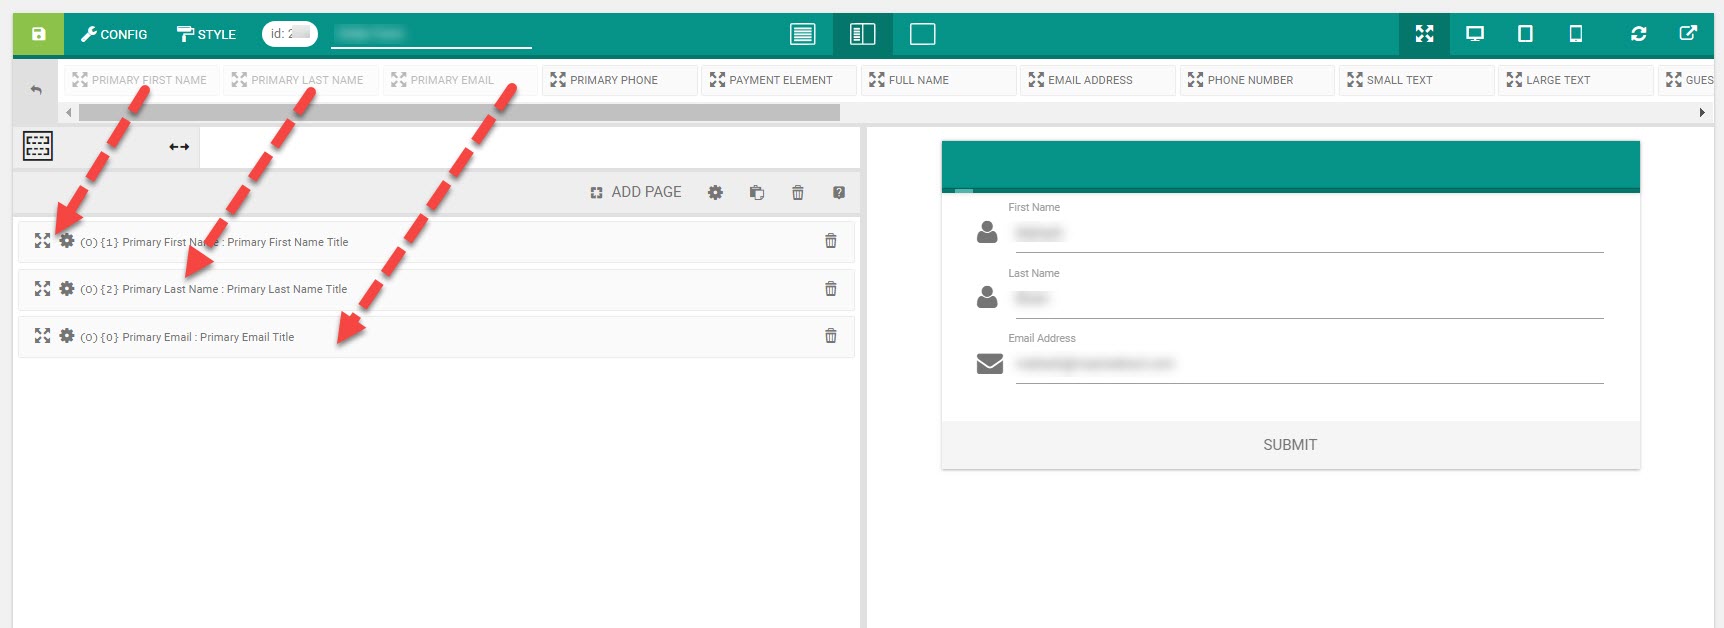
Like any integrations, MailPoet 3 requires the following form fields.
- Primary First Name.
- Primary Last Name.
- Primary Email.
You can find them in Other Form Elements.
#3: Enable Integration
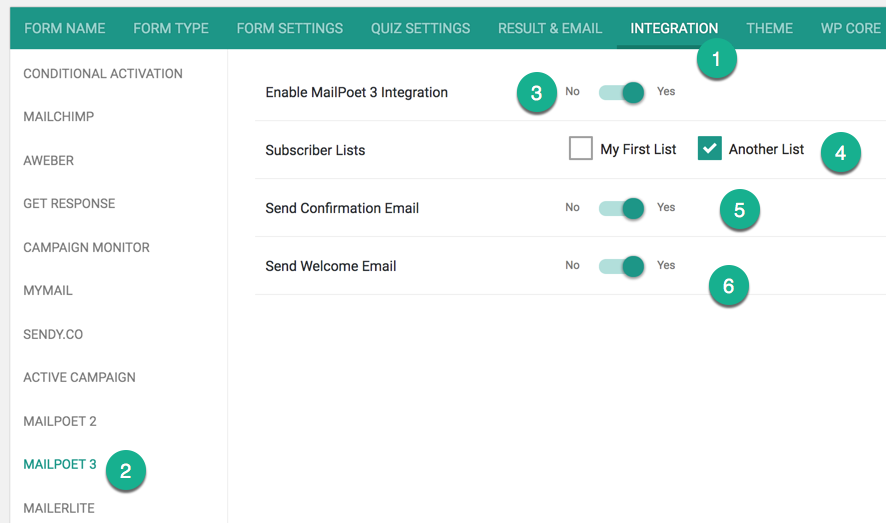
- Go to Form Builder > Integration > MailPoet 3.
- Enable the settings.
- Choose the lists you want the subscriber to get added.
- Optionally set confirmation and welcome message.
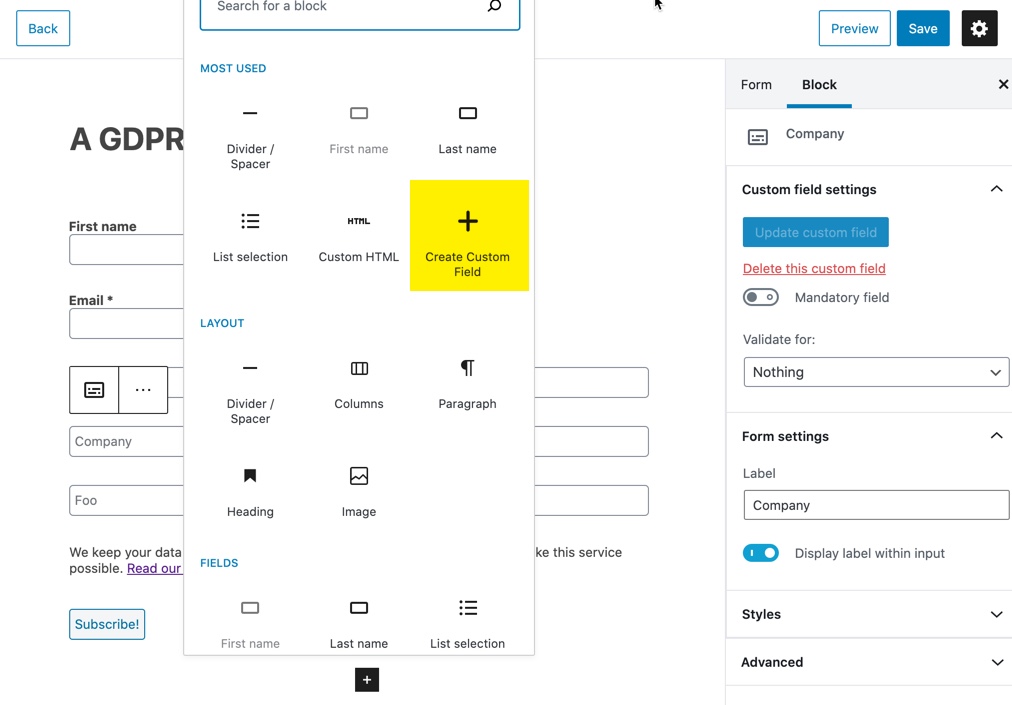
#4: Adding custom fields
First make sure you have added your required custom fields through MailPoet > Forms. From there you can create as many custom fields you want.
Now go to the eForm Form Builder > CONFIG > INTEGRATION > MAILPOET 3 and enable Send additional data as custom fields.
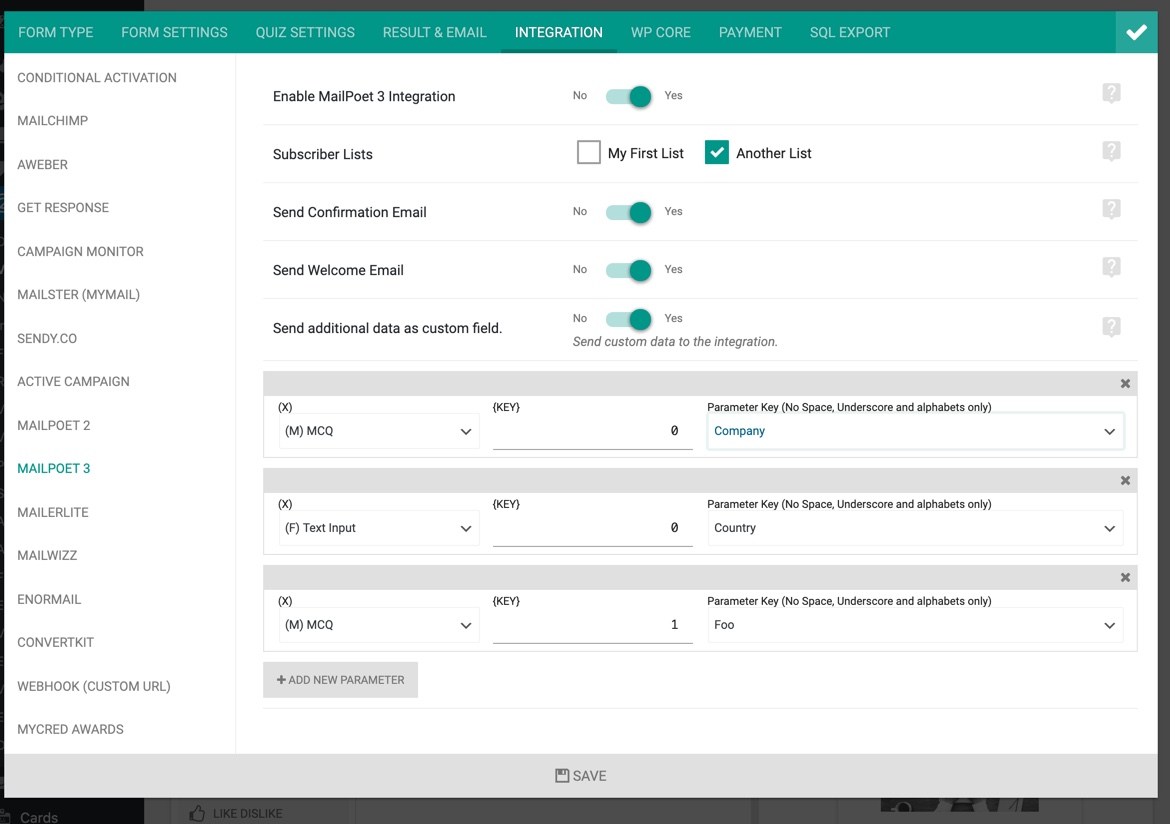
Now map your form fields to MailPoet custom fields from the interface. You will be presented with a list of custom fields as available from MailPoet.
Save the form and now it should add new subscribers along with mentioned custom fields.