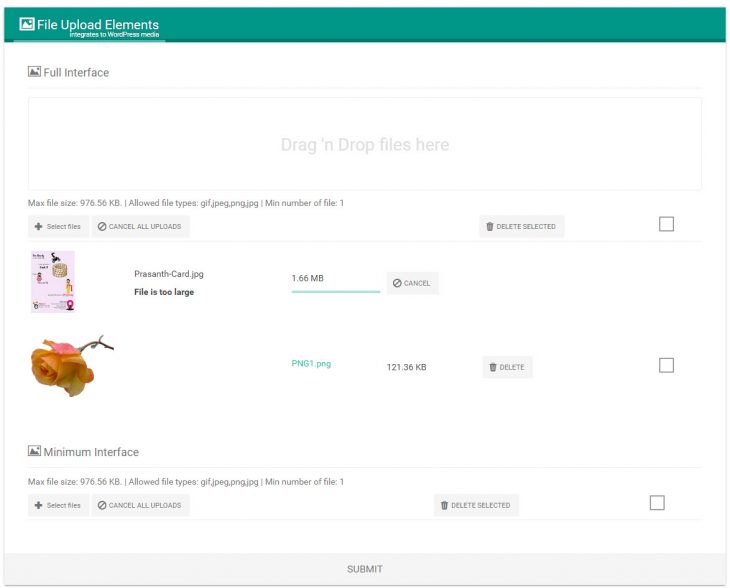
eForm has a beautiful and ajax powered file upload elements using which you can accept files from users. Some of the features are:
- Drag ‘n Drop file handling.
- AJAX upload with progressbar.
- Validation of different file types and size.
- Integration with WordPress Media.
All of the files are uploaded in the wp-content/uploads directory so you get all the security WordPress file handler has.
#1: Adding the File Upload Element
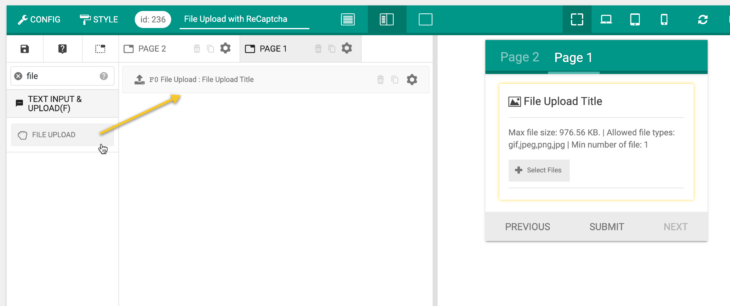
File upload element is available from “Feedback & Upload” toolbar. Simply click on it and drag the “File Upload” element onto your form. Now click on the element to get started.
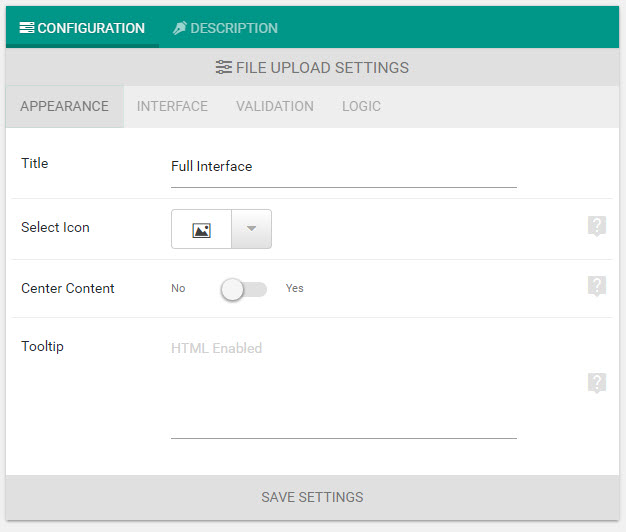
The appearance option takes only title, icon, tooltip and whether the container should be centered.
#2: Modifying interface
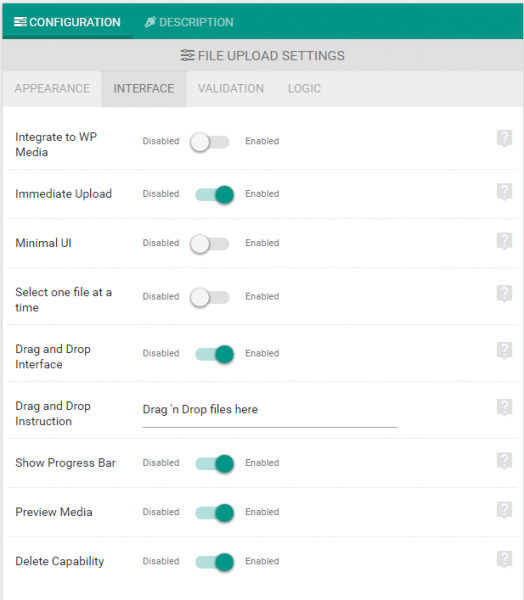
- Integrate to WP Media: If enabled, then the uploaded files will be added to the WordPress media list.
- Immediate Upload: Enabling this will make the upload happen immediately as the user selects files. If disabled, then user would need to explicitly click on the upload button to get started.
- Minimal UI: If enabled, then the upload element will show just the upload button with supported file type instruction. Cancel, checkboxes and bulk operation buttons won’t be shown. Enable this if you are targeting mobile users.
- Drag and Drop Interface: Enable this to show an area in the upload element where users can simply drag and drop files to upload.
- Delete Capability: If enabled, then user would be able to delete the uploaded files.
The image below shows a minimal interface (when the option is enabled).
2.1: Native Capture
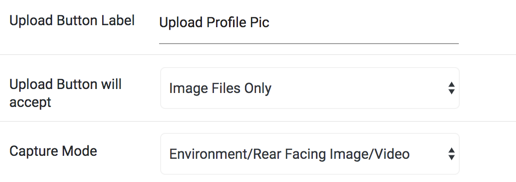
Starting eForm version 4.2, we support native capture. Meaning, you can now force the device to use camera for uploading video, audio and image when available. The settings are found inside the INTERFACE tab.
- Upload button will accept: This is where you force filetype accept through HTML. You can choose to have any file, or specify to accept only image, video or audio.
- Capture Mode: If enabled, then eForm will force the device to use camera for capturing. You can specify rear or front camera and it will be used if available.
Do note that not all capture mode is available for all devices. For example, android devices can not distinct between rear and front camera, whereas iOS devices can. For both the platforms, it is still not available to use built-in microphone for recording audio. But according to W3 specs, these will soon be implemented.
There are other interface settings which are quite self explanatory. You can simply click on the help button next to every option to learn what they are supposed to do.
#3: Modifying Validation
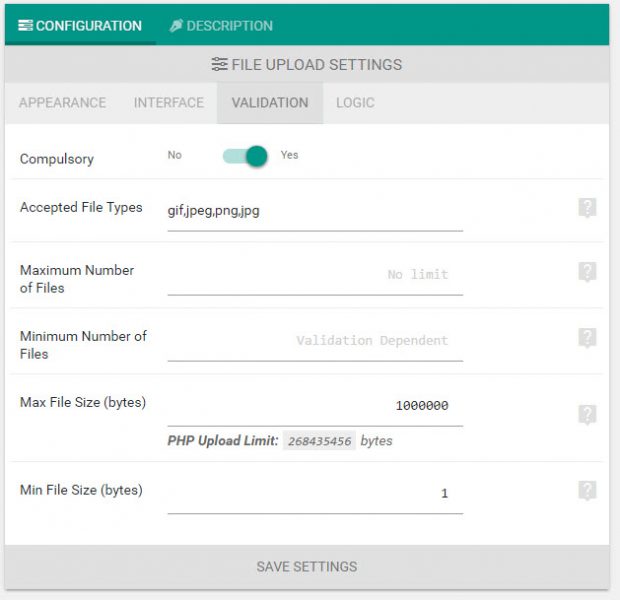
By default the file uploader accepts only image files. Here you can change what file types the uploader should accept. Simply enter comma separated list of accepted file types, like jpg,jpeg,gif,png,pdf,docx,doc etc.
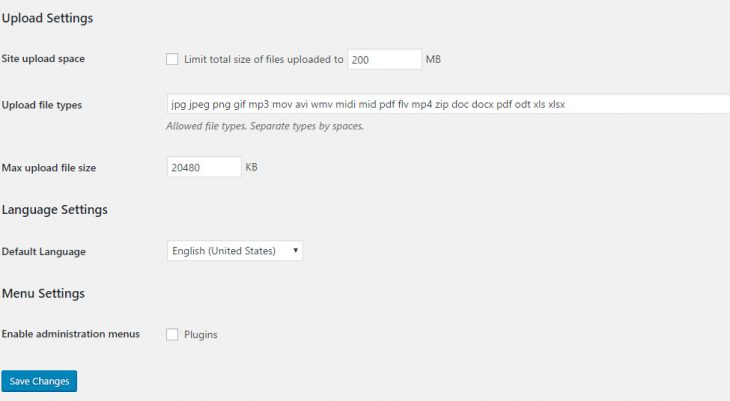
Since the file upload uses WordPress’ own API to handle the upload, so it is possible that some of the files might get rejected by WordPress. If you want to accept files which are not in the default list of WordPress default mime types, then there are two things you need to do.
#3.1: Extend WordPress Mime Type:
- Install the plugin WP Add Mime Types.
- Extend the list by specifying your own.
#3.1: Modify MultiSite Settings:
If you are on WordPress MultiSite, then go to Network Admin > Network Settings.
Now add your extension to the list.
The plugin mentioned above would also allow you to add extensions in MultiSite setup, but I recommend doing this step as well.
#4: Add reCaptcha for security
Starting eForm 4.16, file upload can show reCaptcha and only after solving the reCaptcha can one upload files.
To enable, simply go to the CONFIGURATION > INTERFACE and click on Enable reCaptcha.
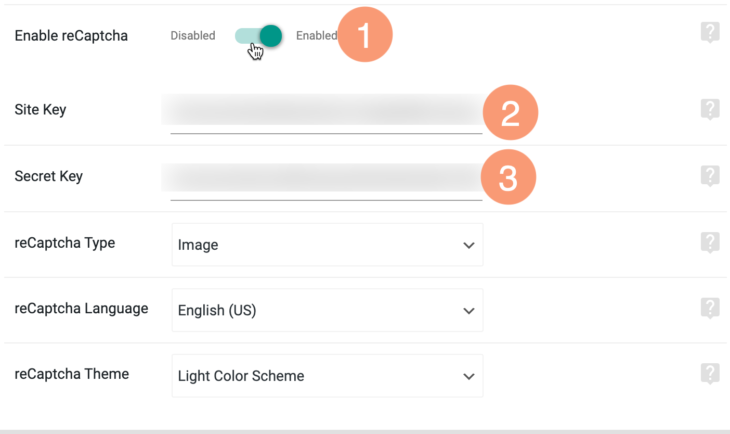
This will show up additional settings like recaptcha keys and theme etc. Fill them up. For now we support only reCaptcha v2.
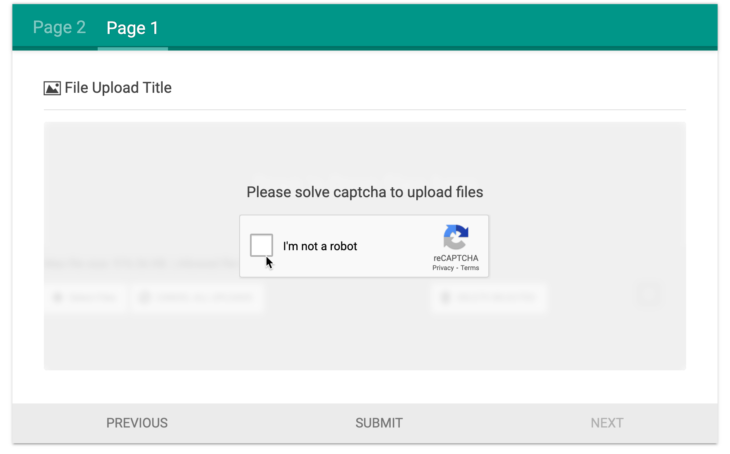
Now one would need to solve the recaptcha before uploading any file.
That was it about File Upload Element. If you have any issues please ask in the forum.
