To correctly send emails to any user who submits a form you’d need to setup your form with the following components.
#1: Add an Email field
While creating or editing a form, you must have the Primary Email field somewhere in your form. If you want to make sure your users get the notification email, then have it compulsory.
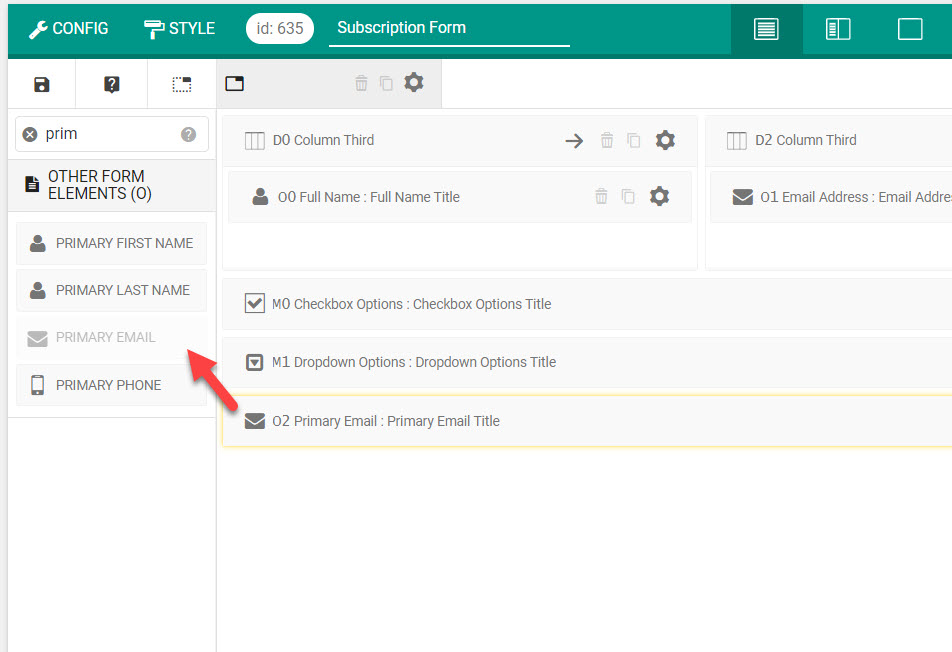
Do note that you’d need to add exactly the field mentioned in the screenshot above. If you add the Email Address field, then it will not send any notification emails. The Primary Email is special in the sense that it is treated as the email of the user (who is submitting the form) and is stored directly into the database. It will even get pre-populated for logged in users.
#1.1: Proper settings of the field
Like any other fields, you’d need to set the primary label and optionally a description text (subtitle).
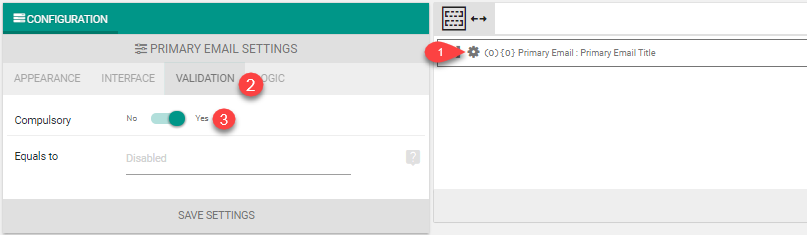
#1.2: Making it compulsory
The field is compulsory by default (if you add it). You can change it however by clicking on the “Customize Validation” button.
#2: Modify the User Notification
From the Result & email [icon type=”glyphicon-arrow-right”] User Notifications you’d need to set the following settings.

#2.1: Set Sender’s Email
This is necessary for the user notification email to work. By default it is set to the administrator email address of the site. You can change it to what-so-ever you like. Consider an email from the same domain or SMTP email for avoiding the spam issue.
#2.2: Set Notification Message
It is important to set a notification message. By default it is just a bare-bone message which says
Thank you
%NAME%for taking the quiz/survey/feedback.
We have received your answers. You can view it anytime from this link below:
%TRACK_LINK%
We have also attached a copy of your submission.
You should change it to something more meaningful. Be sure to check the available format strings.
#2.3: Include full form submission
You can also attach a full copy of the submission. To do so, enable the Attach Submission to user email.
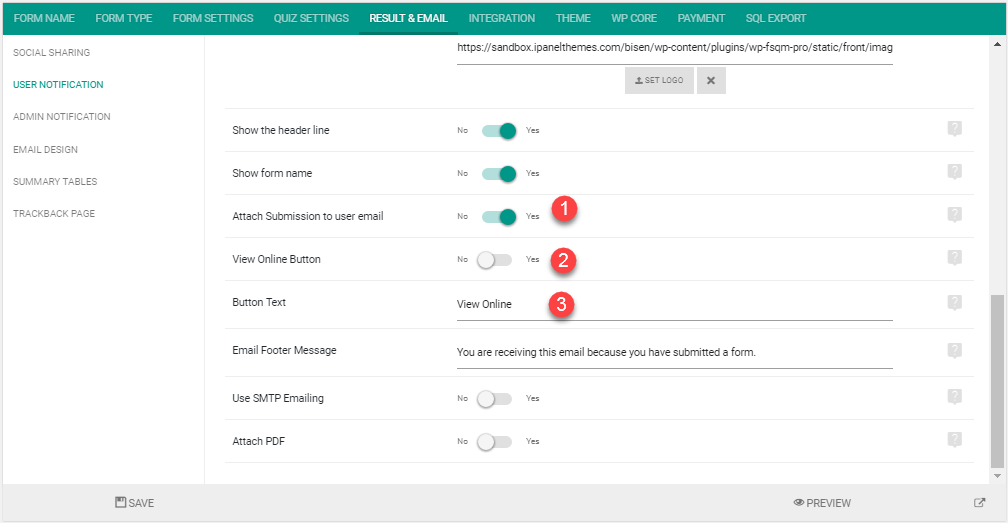
Optionally you can also have a View Online type button, which would link to the trackback page.
#2.3: Set other settings
You’d also setup Sender’s Name and Notification Subject to make your email look good.
[notification type=”alert-info” close=”false” ]Note: If you are using non SMTP mail, then mails are sent from [email protected]. The Sender’s Email is set as a Sender header in the sent email. This method is proposed by google. Check this guide if you need to send through SMTP.[/notification]
That’s it. Now test your email settings by submitting a form. You can also change the design of the email by following this guide. If anything goes wrong, please use our support forum to ask.
Hi,
I am using this theme on my site http://www.blackburncab.org.uk/
I’d like to know how to customize the administrator notification email?
i can only customize the user notification email..
is there any such option?
Hello,
Please ask in the forums.
is there any Notification Message customization form for admin notifications?
Hi,
I need to upload a photo in form and user must receive a fullcopy af all fields + photo by email. As admin I receive the email but the sender user not. Plus, the form in stuck with a message in the bottom “processing”.
Please help me
thank you
Hello,
Please ask in the forums: http://wpquark.com/kb/support/ We might need some sensitive information to debug your issue.
I’ve deployed the a form on my php servers, but the admin notification doesn’t seem to be working. I’ve made sure the email to and from address were correct. Also check the spam box. But nothing seems to be received. Can you advise where else to check?
Please ask in the support forum.