eForm version 2.5.1 and upper, supports beautiful and responsive emails sent to users. The design of the email has been kept very minimalist and flat so that you can easily change colors etc to make it even more matching with your website.
To get started, first make sure you have setup everything needed to send notification emails to users. Once there, you can change the following designs.
#1: Change Logo and Images:
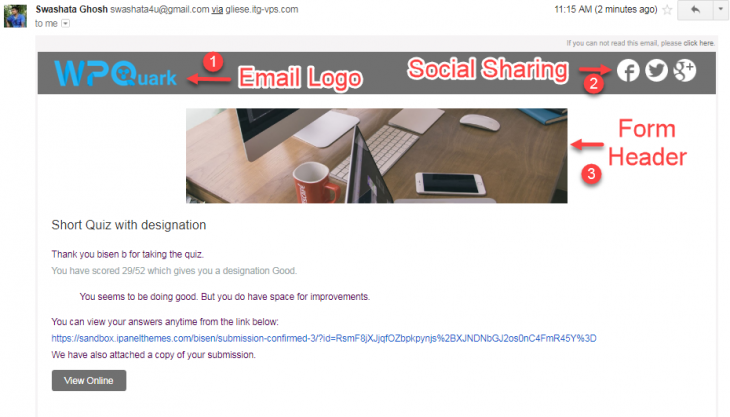
Email logo is the one that is shown on the table head. Email image is basically the form header and also incorporated inside the email to make it more attractive.
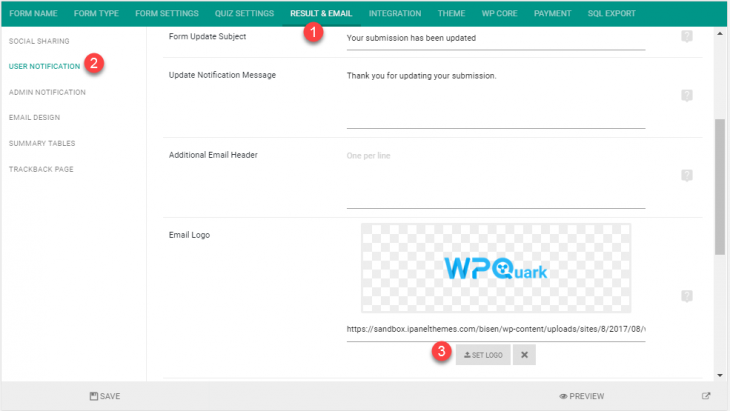
To change user email logo:
- Go to Form Builder > Result & email > User Notification.
- Scroll to Email Logo and upload an image of size 150px X 28px.
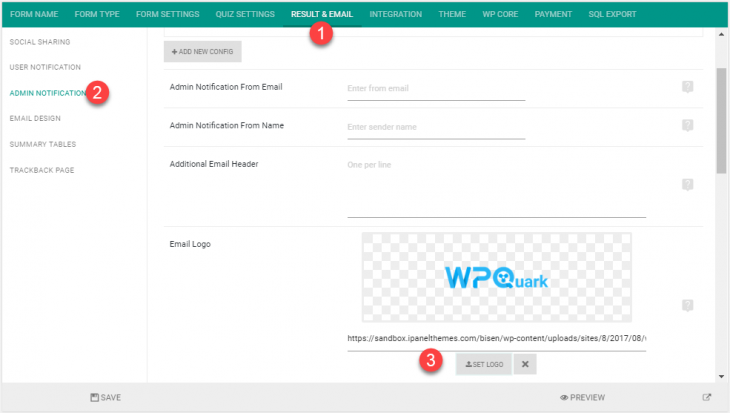
To change admin email logo:
- Go to Form Builder > Result & email > Admin Notification.
- Scroll to Email Logo and upload an image of size 150px X 28px.
Save the form and you’re done. Make sure that the image would go nice with the accent background color (details below). We recommend setting up a PNG image with transparent background.
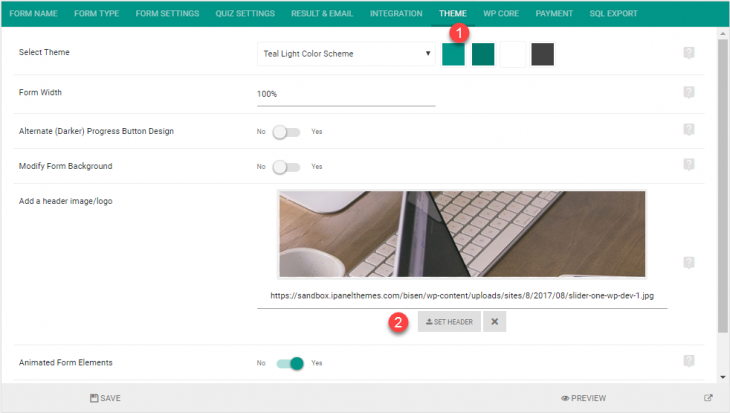
To change the Form Header Image:
- Go to Form Builder > Form Theme.
- Set Header Image/Logo.
#2: Set Email Accent Color:
To change the header background color, please follow the procedure below:
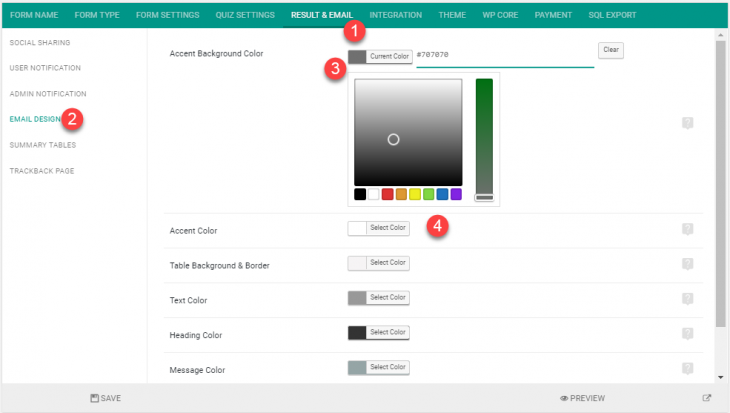
- Go to Form Builder > Result & email > Email Design.
- Set Accent Background Color and Accent Color.
This will be used for both admin and user emails. The social sharing images are always rendered in white. So make sure you use a darker tone for background color.
#3: Set email text color:
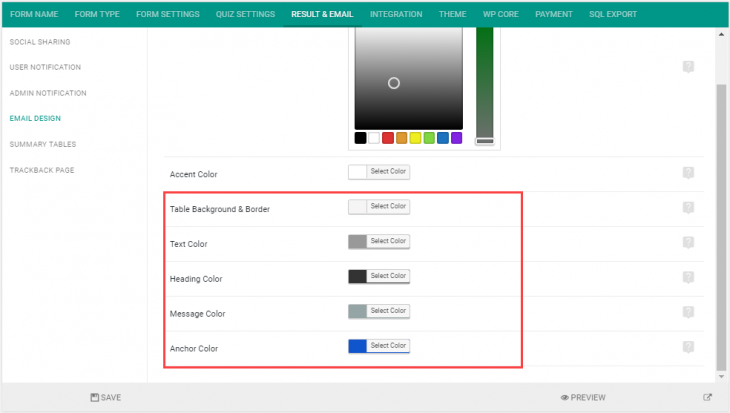
Starting version 3.2.0, it is possible to change other email template colors. Please see the image above. If you do not see these options, then please upgrade to the latest version of eForm.
Quick question – can I paste an image into the body of the automatic form notification email? Thanks!
Sure you can. The email supports HTML.