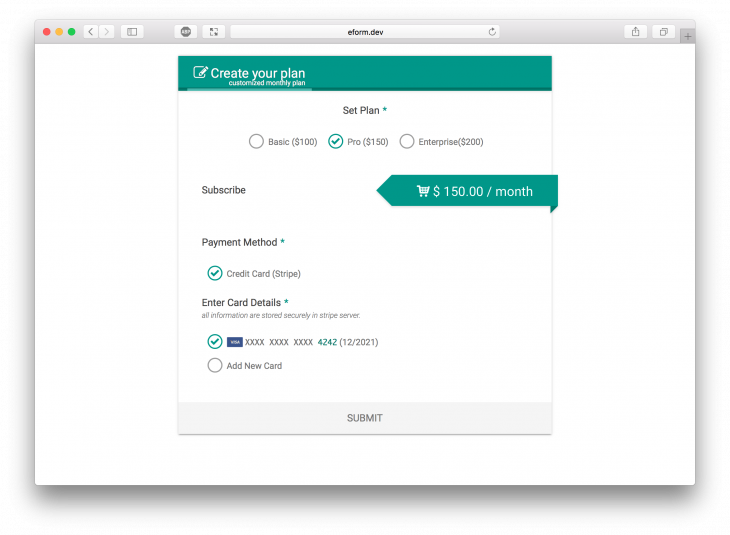
Starting version 4.1.0, eForm has the capability to create dynamic and static subscription forms. For now, only Stripe has such integration available.
Enabling Subscription Settings
To get started you would create a Payment Form and enable the subscription from the settings.
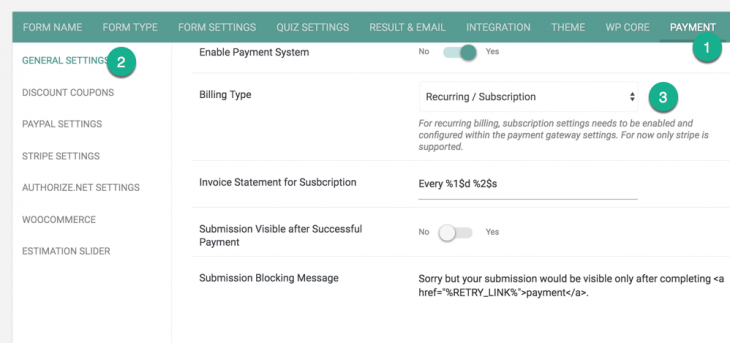
- Go to Form Builder > Payment > General Settings.
- Set Billing Type to “Recurring / Subscription”.
This makes eForm think that the payment form is of the type Subscription. Now we need to configure gateways. As of version 4.1.0, only stripe is supported, but we will continue to add more gateways.
Configure Stripe Gateway
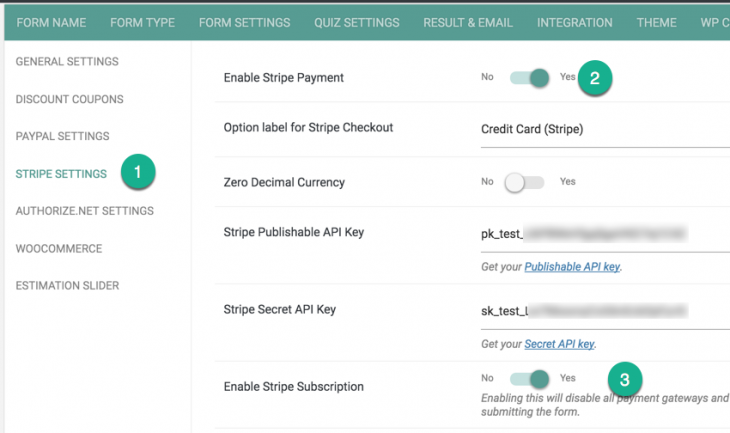
- Go to Form Builder > Payment > Stripe Settings.
- Enable Stripe and Stripe Subscription.
Now this will give you option on the plan type. You have two choices.
Dynamic Plan
Here your payment formula will be used to create a plan on the go and subscribe the customer. Use this, if your plans are too flexible and needs to be created for every submission. Regardless of the plan amount a new one will be created everytime user submits.
Available options are:
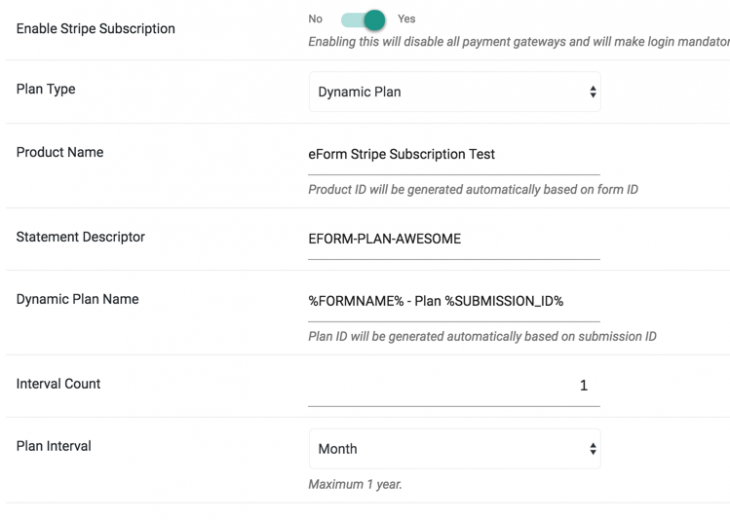
- Product Name: Starting Stripe API 2018-02-05 now all plans must go under a product with type=service. eForm v5.0 will leverage this by creating a product per form. All new dynamic plans will go under this product. Enter a Product name which may be shown to your customers.
- Dynamic Plan Name: Put your plan name. You can also use any format string (along with the easySubmission add-on).
- Interval Count: The frequency of the interval.
- Plan Interval: Interval duration. Could be day, week, month or year. Use it along with interval count to create a custom frequency. For example, set Interval Count to 3 and Plan Interval to Week, to charge every 3 weeks.
- Statement Descriptor: What would be shown on the Credit Card charge.
Predefined Plan
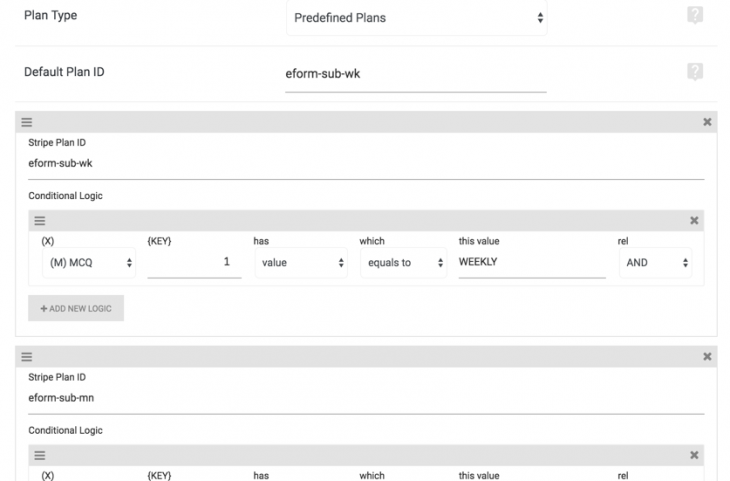
Use this if your form would subscribe to a specific plan under a product you have already created in Stripe Dashboard. You can also set condition on any number of plan IDs depending on form selection.
- Default Plan ID: The default plan ID available from your Stripe Dashboard.
- Conditional Plan ID: This part allows you to override default plan ID depending on form selection. Click on ADD NEW CONFIG to get started, put Stripe Plan ID and click ADD NEW LOGIC to assign logic against the plan ID.
Do note that although depending on your formula, payment element may show different amount, but eForm won’t attempt to set plan amount or create a new plan. What so ever is available within your stripe dashboard will be used.
Getting Stripe Plan ID
To find the Plan ID, please do the following.
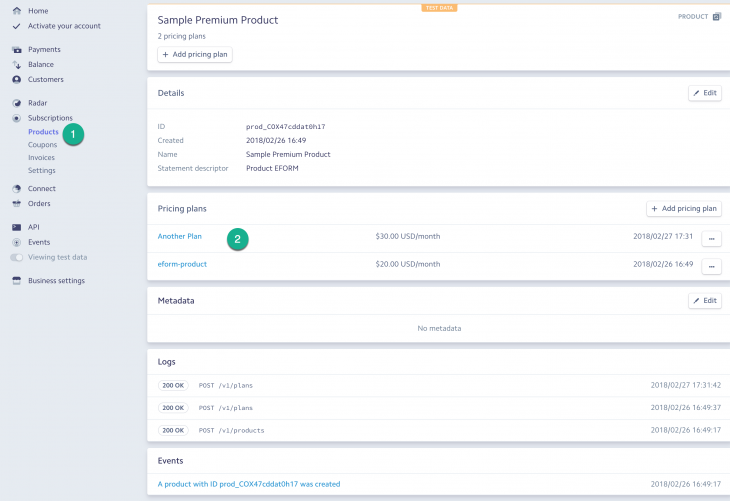
- Go to Stripe Dashboard > Subscription > Products.
- Now click on the product you have your plan on.
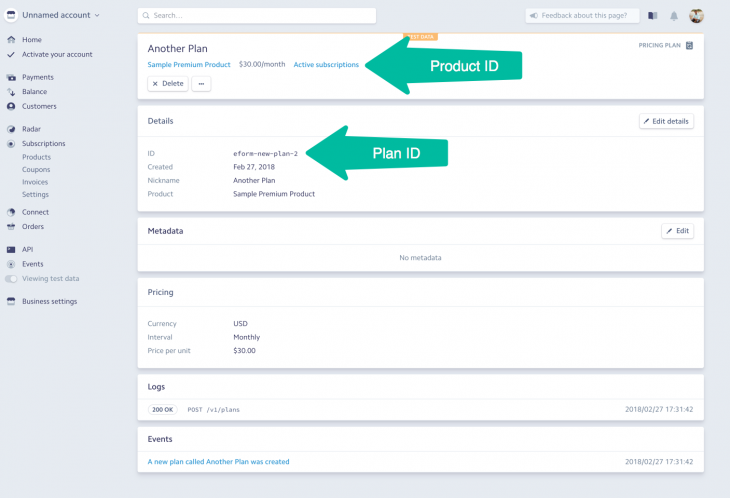
- Click on the Plan.
- Copy the Plan ID.
Also we do not really need the product ID, because all plans need to have unique ID anyway and Stripe handles it automatically. So no matter under which product your plan actually is. Stripe has implemented Product/Plan base grouping with their API update from 2018-02-05.
Some Notes
- eForm creates a Stripe customer based on current logged in user. So enabling Subscription Form would automatically make the form work only for logged in users.
- When user adds a card, eForm would fetch it again for the same/different form and would show it to the logged in user. So you must use same stripe API keys for all forms.
- If for some reason, you want to reset the customer data from users, (for example, migrating from test to live APIs) use plugins such as User Meta Editor to delete the meta key
eform_stripe_custid.
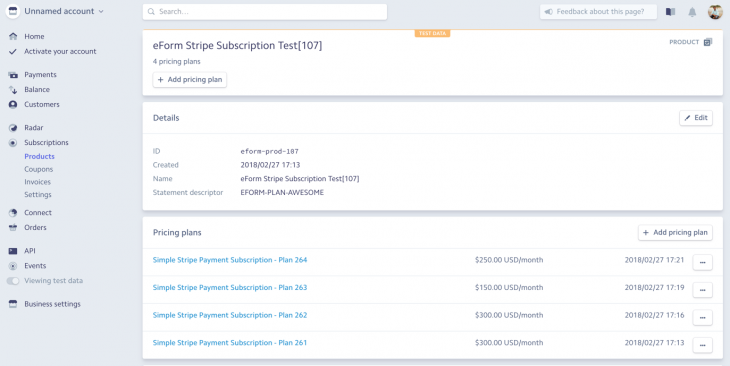
For dynamic plans, starting eForm v5.0, all created plans will be grouped under a Product (with type=service) named as defined by you, prefixed by the form ID. In the image above you see a product being created under the name eForm Stripe Subscription Test[107] where 107 is the ID of the form. Every plan, “Simple Stripe Payment Subscription – Plan 264” refer to a submission.
