Starting version 3, you can turn any eForm managed form into a fully featured payment system. The pre-requisites are:
- You have at least one element which supports mathematical calculation.
- You have at least one of the payment gateways enabled.
To get started please follow the guide.
#1: Enable Payment System
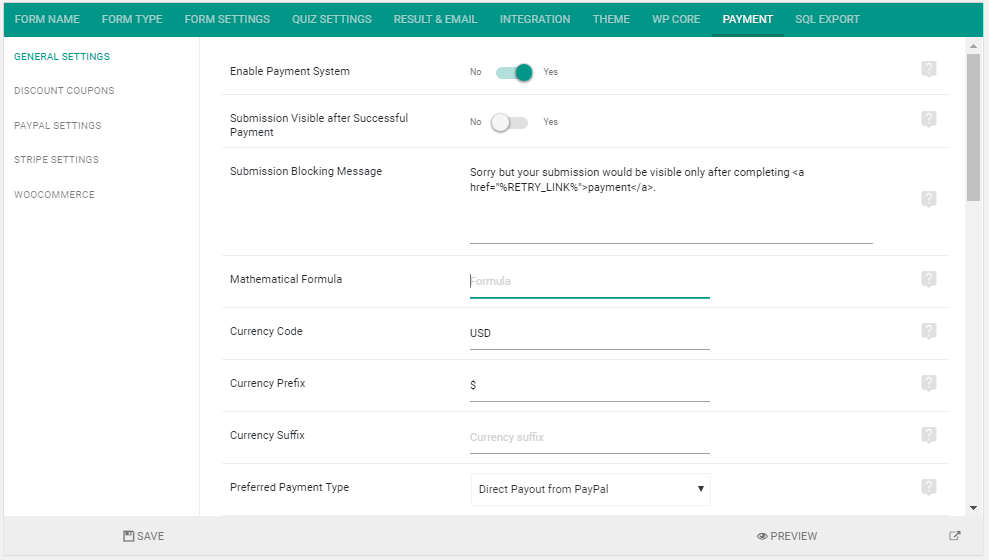
- Under the Payment > General Settings tab inside eForm Form builder, enable the Payment System.
- Enter the mathematical formula that you’d want to use for calculating the total amount. This behaves just like any mathematical field.
- Set your currency code. Both PayPal and Stripe uses common currency codes right now. But you can always check them here (PayPal) and here (Stripe).
- Optionally set other settings.
# 1.1: Product and Invoice Settings:
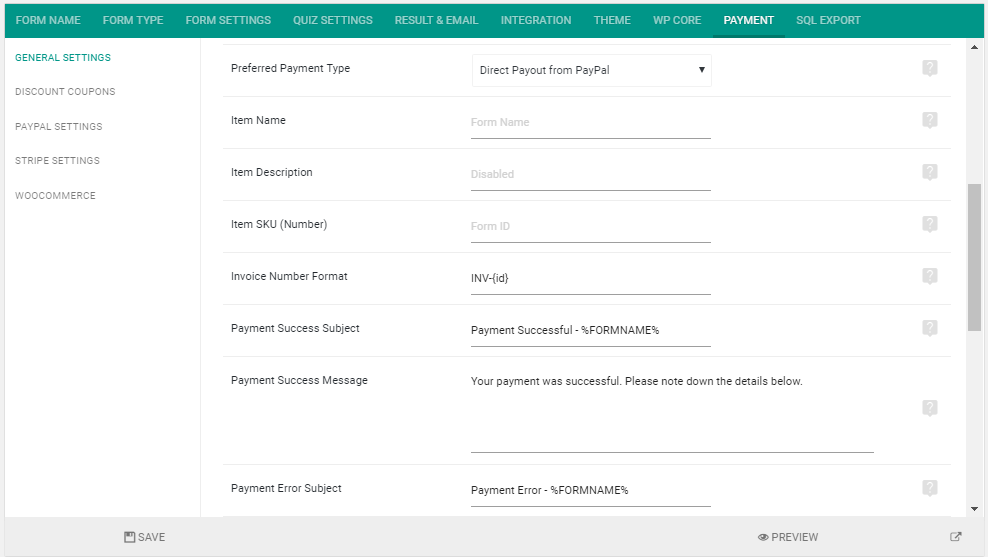
eForm allows you to have a custom name for the product and give product number and customize Invoice ID. To do so, simply edit the corresponding fields in the Payments settings. Make sure to have {id} format string in the Invoice ID field. Otherwise it may result in duplicate Invoice IDs.
#1.2: Payment Related messages and mail:
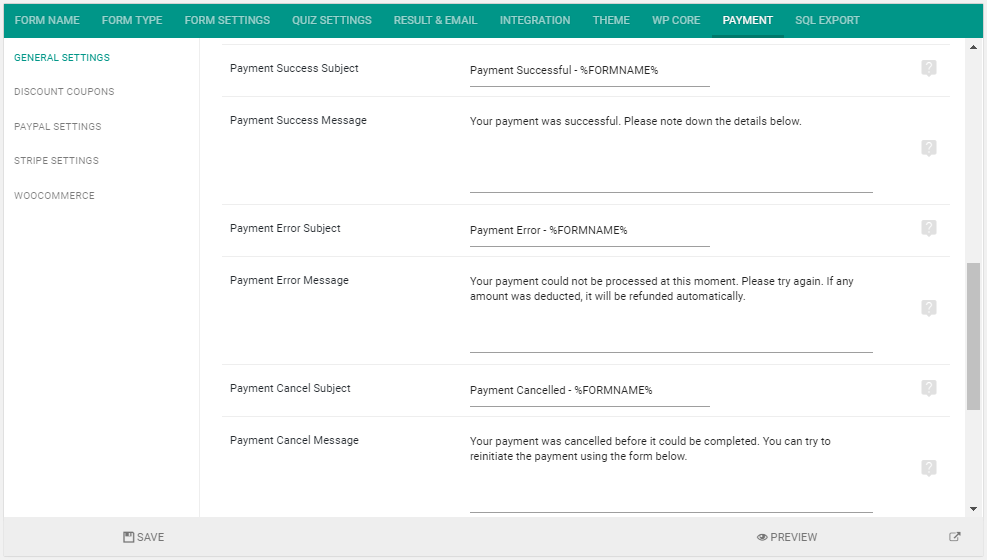
Further down the General Settings tab, you will see fields from where you can enter custom messages that would be shown to the users for various payment related situations. You can modify them or leave the default ones.
#1.3: Coupons:
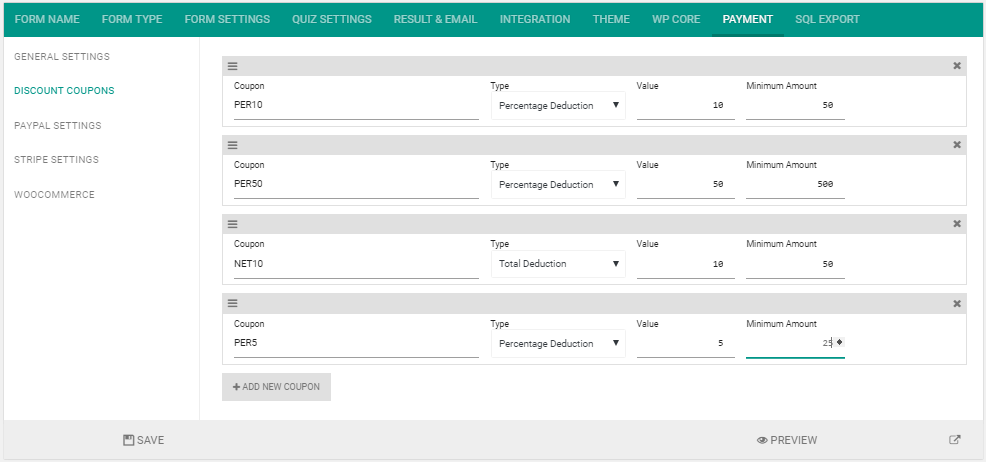
eForm allows you to enter custom coupon codes for discounts.
- Click on the Payment > Discount Coupons tab.
- Add a new Coupon.
- Enter the coupon code, discount type, deduction value and minimum amount.
- Discount type can be either percentage deduction or total deduction.
- Minimum amount is the amount required for the coupon to be applicable.
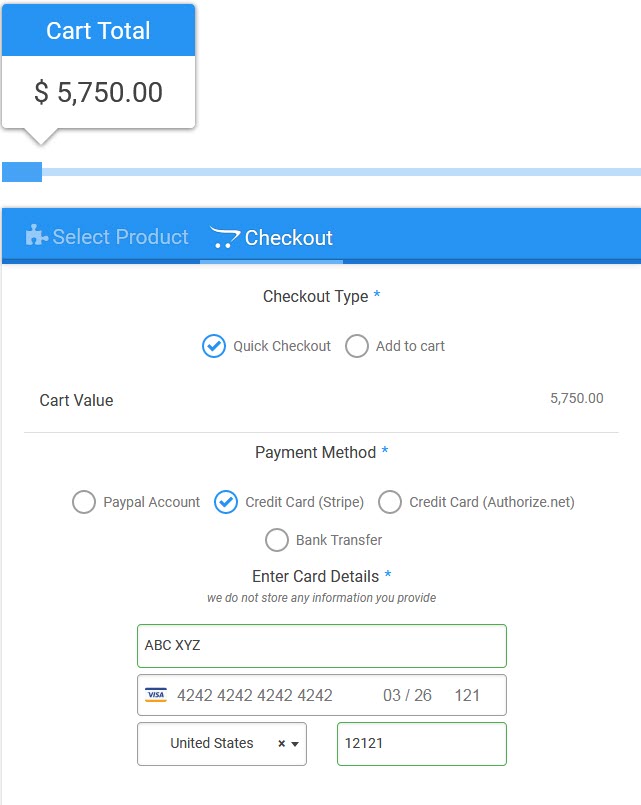
#2: Adding a Payment Element
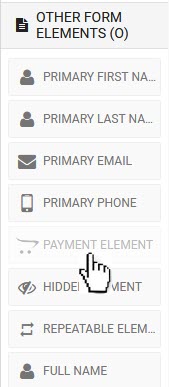
Next you would need to add a payment element anywhere in your form, just like you would add any other form elements.
- Go to Other Form Elements.
- Drag and Drop (or click) the Payment Element anywhere in your form.
- The place where you drop the payment element would actually show the payment form.
#2.1: Payment Element Settings:
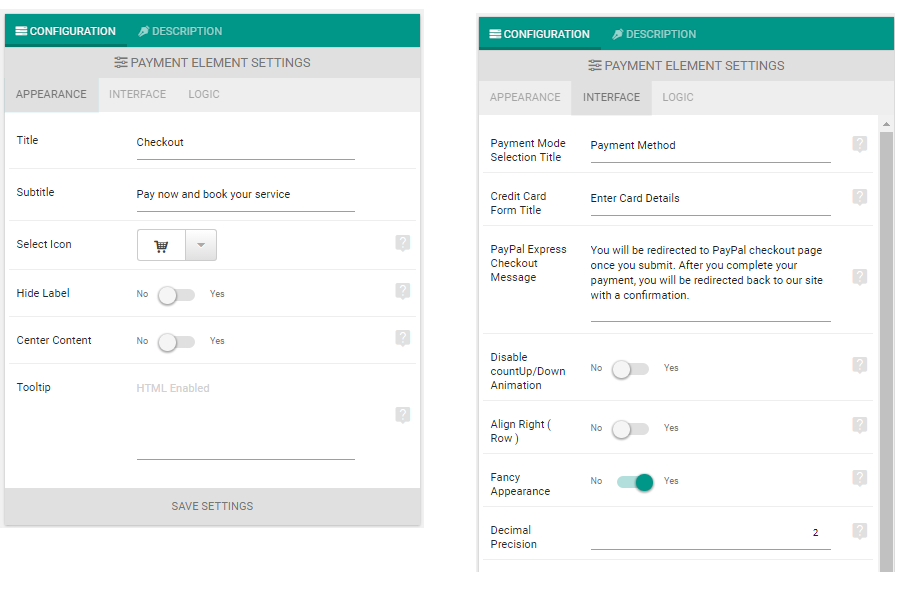
Just like any other element, you click on the cog icon of the payment element and customize various settings. It also has various mathematical element settings for showing the total amount.
#2.2: Conditional logic on Payment Element:

Enabling conditional logic on payment element would make your form a conditional payment form. If the condition satisfies, then only the element would be shown and payment would be collected. If the payment element remains conditionally hidden, then payment would not be collected.