The navigation menu is built using twitter bootstrap and uses a modified version of wp-bootstrap-navwalker class by twittem. Using it very simple. You do not need to do any programming on your end, just add a menu using Appearance [icon type=”glyphicon-arrow-right”] Menu and set it to the primary menu location of the theme.
You can however, customize various components to add more styling. Read more to learn how.
Adding a logo
Customizing Navbar or Site Logo
Logo is managed over WordPress custom header. Simply go to Appearance [icon type=”glyphicon-arrow-right”] Header and upload a logo png of size 200X50.
If you remove header image, then the default site title will be used.
Creating a Menu
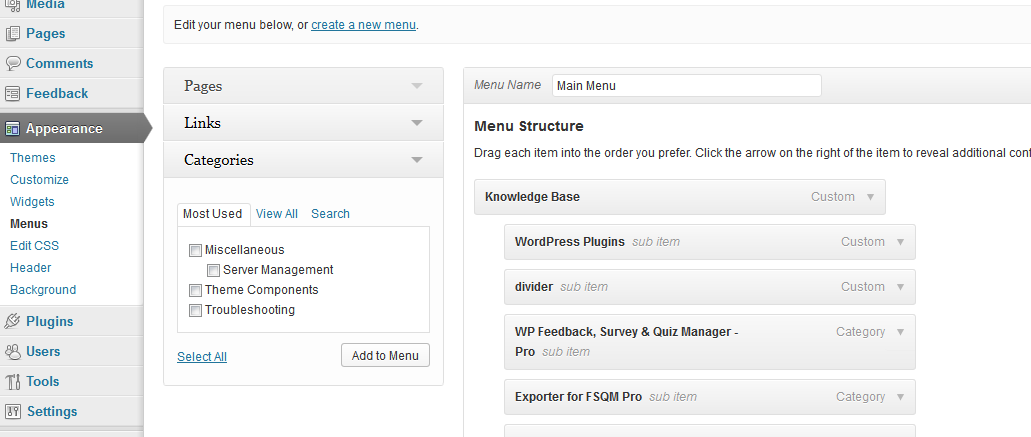
Creating menu from WordPress Appearance
- Start creating a menu by going to Appearance [icon type=”glyphicon-arrow-right”] Menu.
- Save your menu once you are done.
- Assign the location “Primary Menu” to it.
That’s it.
Customizing the Menu
There are many ways to customize and add bootstrap components to the menu. All of them are given below.
Adding Icons to any element
Adding Icons to Navmenu items
Both glyphicons and icomoon icons are available. To add any icon, put the icon class inside the “Link Relationship (XFN)“. For a list of available icon classes, check this.
[toggles class=”yourcustomclass”]
[toggle title=”If you can not see Link Relation XFN”]
You need to enable it from the Screen Options. On the top right corner of your screen click on the button (beside the Help) that says Screen Options and enable Link Relation XFN.
[/toggle]
[/toggles]
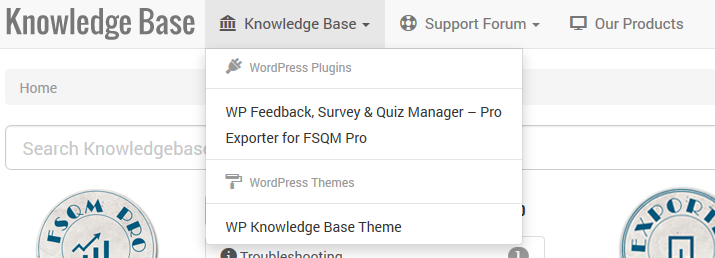
Adding Dividers between items
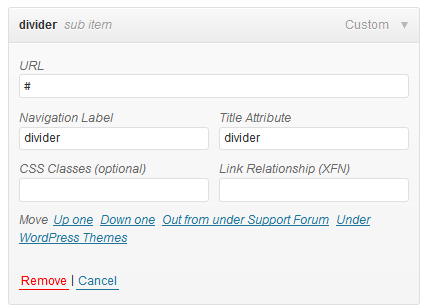
Adding Dividers to the Navmenu
Add a link menu item with URL # and Link Text or Title Attribute of divider.
Adding Dropdown Headers
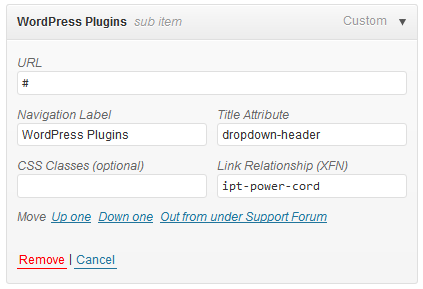
Adding Dropdown Headers between nav items
Add a new link with URL of # and a Title Attribute of dropdown-header.
Adding Disabled Links

Adding Dividers between nav items
To any element, set the Title Attribute to disabled.
For a demo, check the Nav Menu of this site.
Hi,
works all fine but:
on iPad the primary menu doesn’t work.
While trying to fix that I found, that I don’t have the URL-Field when customizing menu under Appearance.
Can you help?
I am not sure I understand your problem. Best guess is, disable all other plugins and enable them one by one to identify the culprit.
How can I add a company logo to the top line where it says Knowledge Base?
Thanks.
It is written here in this article only. “Logo is managed over WordPress custom header. Simply go to Appearance -> Header and upload a logo png of size 200X50.”
Great job! I use it and it’s amazing!. Juste a question : where can I found documentation about changing color (my theme is orange and not blue..). Thanks!
You will need to customize the CSS for that. There aren’t any ready made options to do that.
Hi Swashata,
Your KnowledgeBase theme is absolutely a fantastic piece of work. I am astonished by how thoughtful you are creating this WP theme for the community. I am sure thousands of UX designers will find your theme both beautiful and functional. May I know how to create the top navigation menu on the top right hand corner that has the login, search and pulldown logos?
It isn’t mentioned anywhere in the documentation.
Thanks. Alex
Hello,
It is available in the github version. Sadly WP decided to reject my release until I make one of the plugin (built in theme options plugin) non-mandatory. Until I do that, you have to update manually.
Hi there Mr. how do you add the search box on the top menu in this theme? I’m talking about the search box next to the “login” field in the demo page.
I can’t seem to figure that out.
Thank you!
Nelson.
Hi there sir, I’m using this nice theme you created on my site https://ittutorials.net and everything is working fine but the menu icons. I can’t figure out why they don’t show up. I followed your instructions posted here how to add the icons, but they don’t show up.
Any hint of what I might be missing? I’m using the latest theme hosted at github not the one on wordpress as I noticed that is a bit older.
Thanks for any help you can provide.
Nelson.