First two things that eForm requires to work properly are the Trackback Page and User Portal Page. To keep simplicity and respect user control, we chose not to create these pages during plugin installation, instead ask users to do it themselves where it can be modified to a great extent. Before we dig into how, let us first see what these two pages would do.
#1: Page functionality:
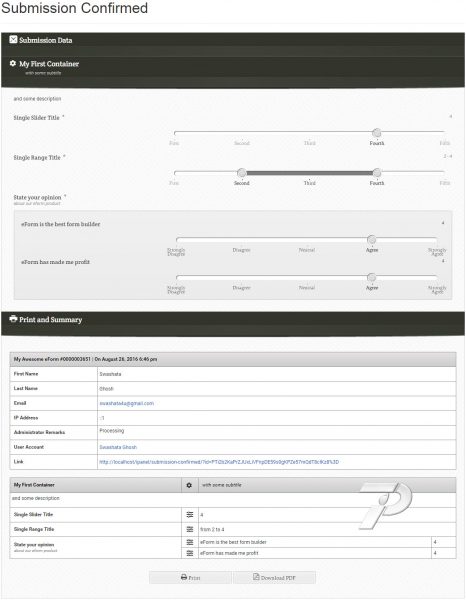
- Trackback Page: This is the page that would show submission to users through some encrypted key. Each time a user submits, a secret encryption key is generated through mcrypt (and that is why it is a requirement) and optionally shared with him/her to view and/or edit their submission in future. In bare-bone, it looks something like this.

But it changes to the form itself when a valid trackback code is entered.

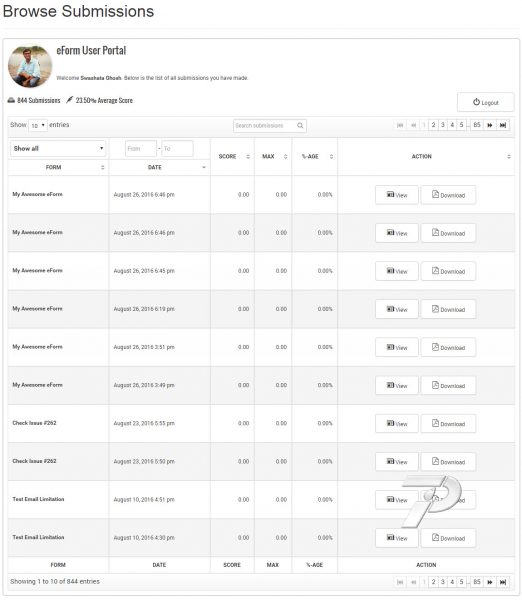
- Central Trackback page for Registered Users: Also known as the User Portal Page. This is where registered and logged in users can see all their past submissions and can even edit them if you permit.

#2: Publishing the Trackback Page:
- Follow the guide published in Shortcode Generator > Trackback Shortcode.
That’s it. Optionally, choose a Full Width Template (if your theme supports) to make it look better.
[notification type=”alert-danger” close=”false” ]If you do not publish and setup the Trackback page, then it would result in broken links on user notification (for default settings).[/notification]
#3: Publishing the User Portal Page
- Follow the same procedure written in Shortcode Generator > User Portal Shortcode.
Here also optionally set the page template to full width. Also choose one of the Designer Themes to make the portal page look modern.
[notification type=”alert-warning” close=”false” ]If you do not set the User Portal page then your registered users will not have an option to browse through their previous/archived submissions.[/notification]
#4: Configuring eForm Plugin:
Now that we have the pages published, we can move on and configure eForm.
- Go to eForm > Settings.
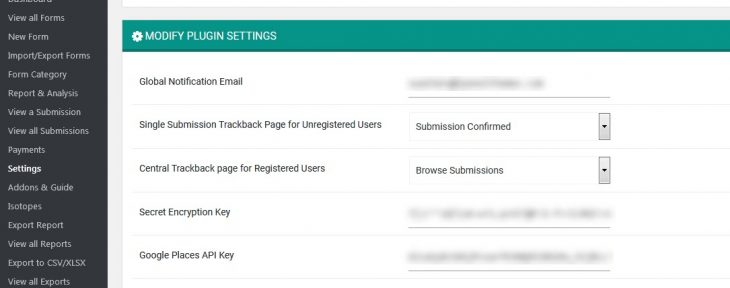
- Select and set the following pages under Modify Plugin Settings.
- Single Submission Trackback Page for Unregistered Users: The one you published in step 2.
- Central Trackback page for Registered Users: The one you published in step 3.
- Save the settings and you are good to go.
That’s all really. If you need to see a video, then check this out.

2 thoughts on “Setup the Trackback Page & User Portal Page”